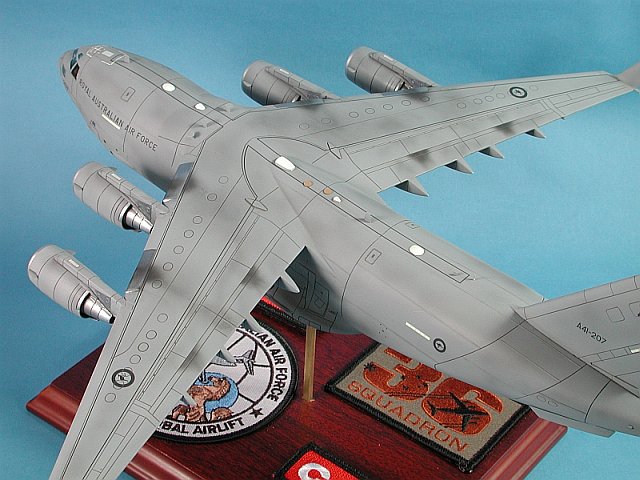
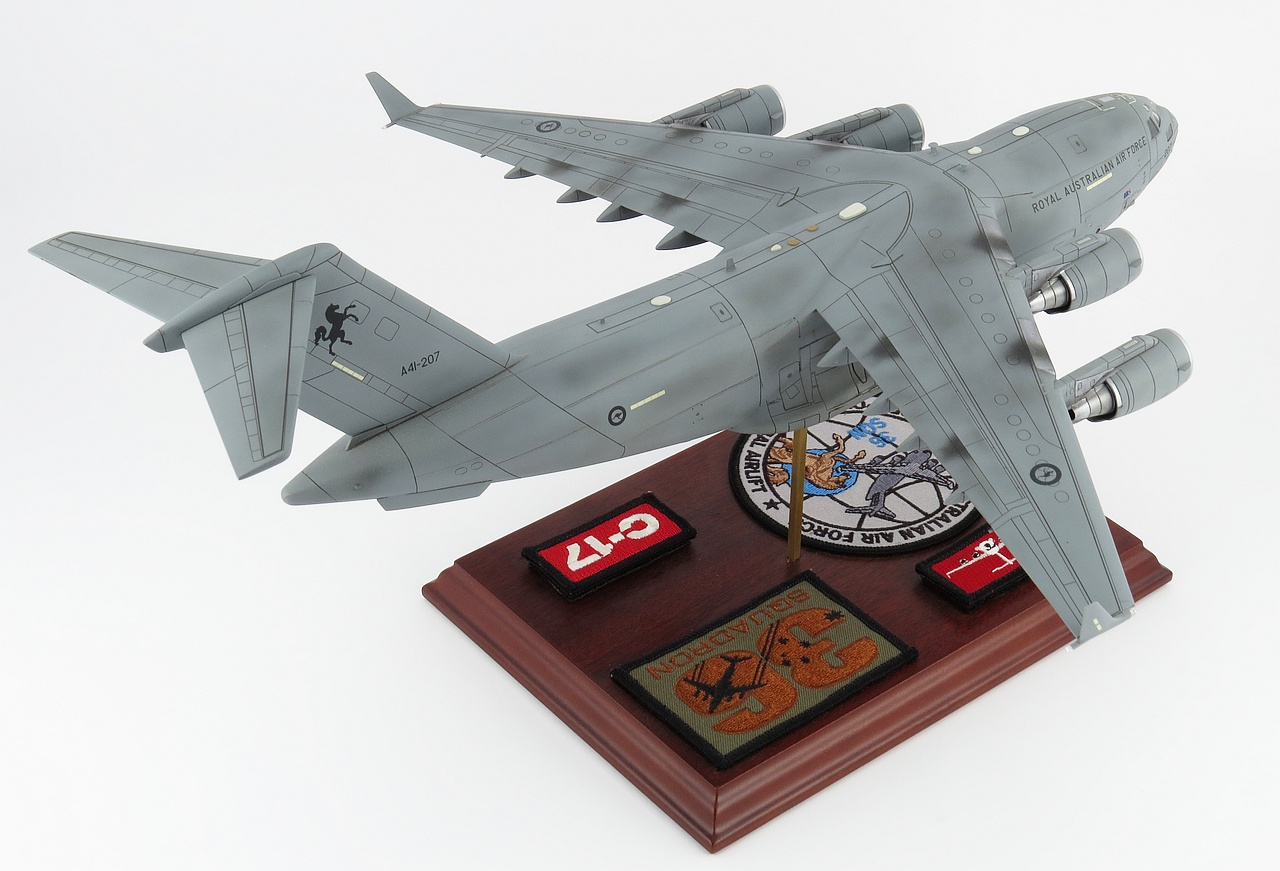
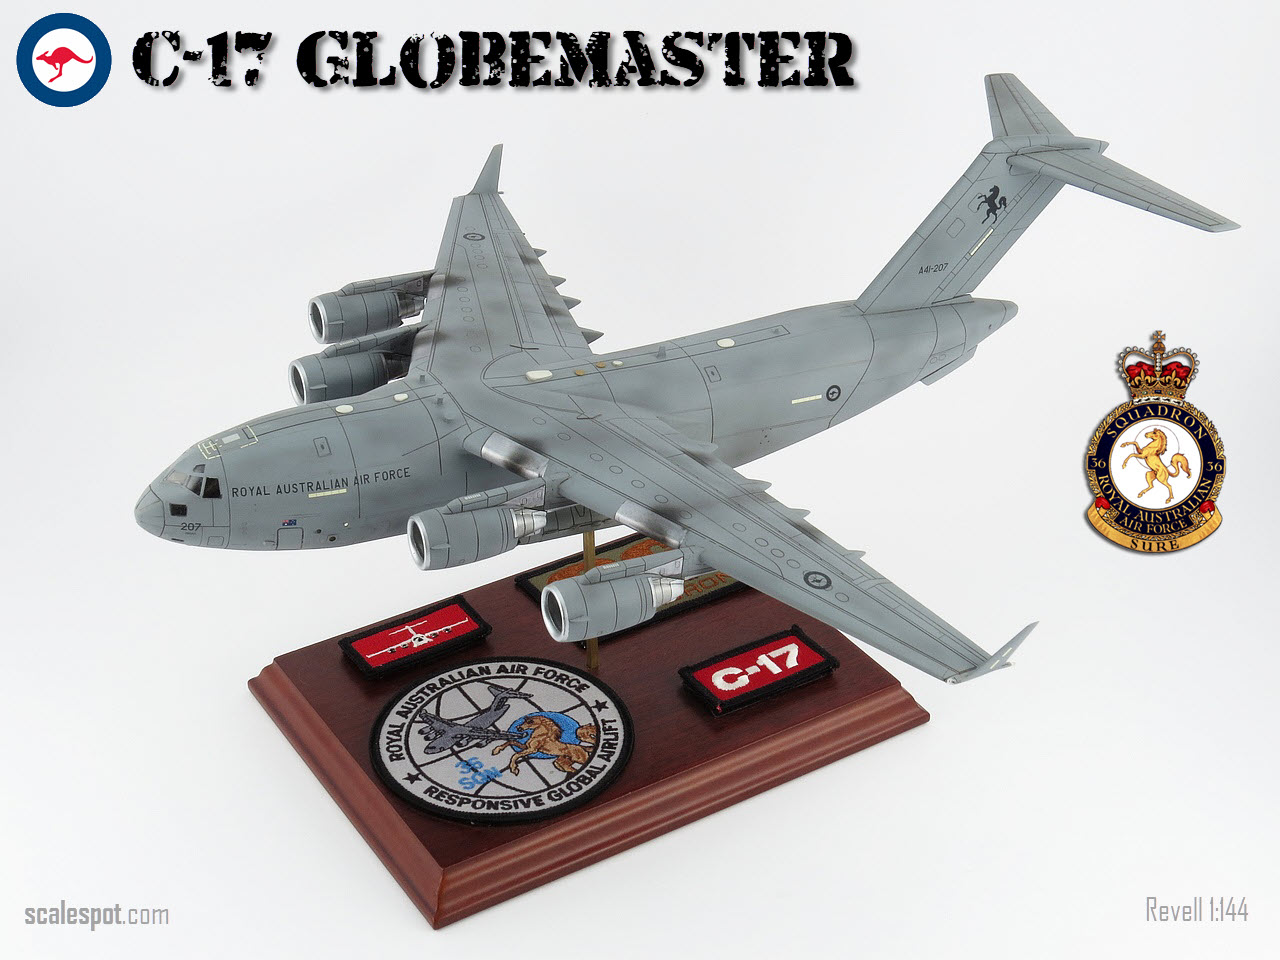
Boeing C-17A Globemaster
Revell (04044)
1:144
Started: Feb 2009
Finished: Mar 2009
Link to Gallery

The Royal Australian Air Force (RAAF) operates eight Boeing C-17 Globemaster III large transport aircraft. Four C-17s were ordered in mid-2006 to improve the ability of the Australian Defence Force (ADF) to operate outside Australia and its region. The aircraft entered service between November 2006 and January 2008, the second pair being delivered ahead of schedule. Two more Globemasters were ordered in 2011, the sixth being delivered to the RAAF in November 2012. Another two C-17s were ordered in October 2014, with the final aircraft being delivered in November 2015. The Globemasters are built to the same specifications as those operated by the United States Air Force (USAF), and the Australian aircraft are maintained through an international contract with Boeing.

All of the RAAF's Globemasters are assigned to No. 36 Squadron and are based at RAAF Base Amberley in Queensland. The aircraft have supported ADF operations in Afghanistan, Iraq and other locations in the Middle East, as well as training exercises in Australia and the United States. They have also transported supplies and personnel as part of relief efforts following natural disasters in Australia, Japan, New Zealand and several other countries.

The C-17s are highly regarded throughout the Australian military for their ability to carry large amounts of cargo across long distances, and the process through which they were acquired has been identified as an example of good practice in defence procurement.
KIT OVERVIEW - Revell 1:144 C-17A Globemaster (04044)
The 2009 Revell C-17 Globemaster is a welcome addition to my model collection. I'm not really into transport aircraft, however when I saw this guy up close at the RAAF Airshow at Amberly, I fell in love. With the the release of the Revell kit in 1/144 and the Xtradecal markings I decided it was time to get into it.
BUILD - Revell 1:144 C-17A Globemaster (04044)
Having attended the RAAF Airshow at Amberly last year, I was pretty impressed by the new C-17 Globemaster. So when I heard that Revell was releasing a kit in 1/144 scale, I pre-ordered it. Shortly thereafter, Hannants announced a decal sheet that had marking for all 4 current RAAF machines and I was se

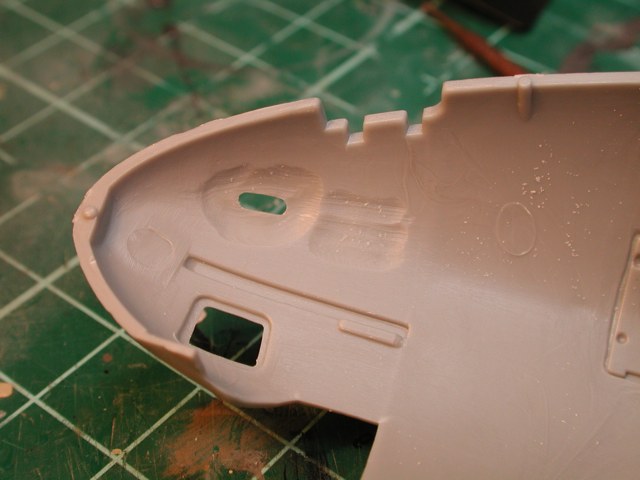
My first impressions of the kit was one of high detail for such a small scale. Revell provide pretty much a full interior in the form of an internal barrel seen here. As my model was destined to be on a pole in flight, the interior detail was of little consequence to me. The flight eck as seen here is more than adequate for the small windows it will eventually be seen thru

Here we can see the internal barrel being test fitted to the external fuselage half
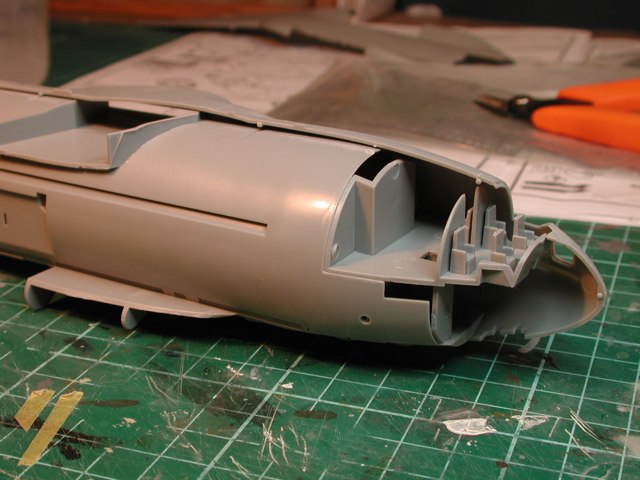
A view of the same fusleage half and internal barrel from the rear. You can get a glimpse of the internal detail provided

A slightly wider shot of the whole length of the fuselage to allow you to see the full extent of how the internal parts fit

As my model was to be in flight, I started by closing up the undercarriage doors. As you can see, the fit in the closed position was not very good. Large gaps would have to be filled (with Milliput) and rescribed to bring this into line with the rest of the models details

The wings were glued pretty much as supplied in the kit. I made no attempt to drop flaps or slats

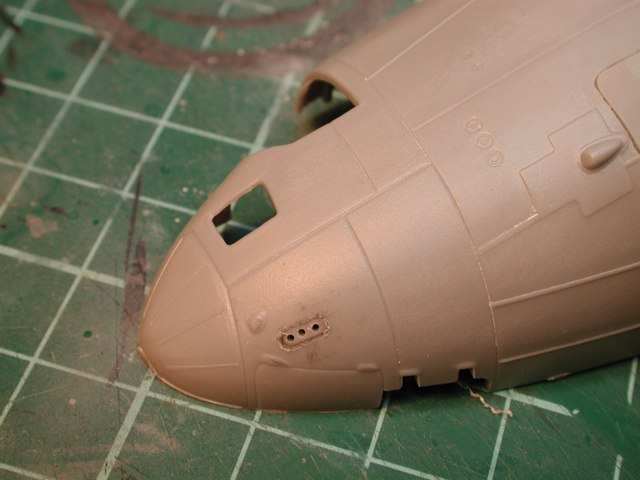
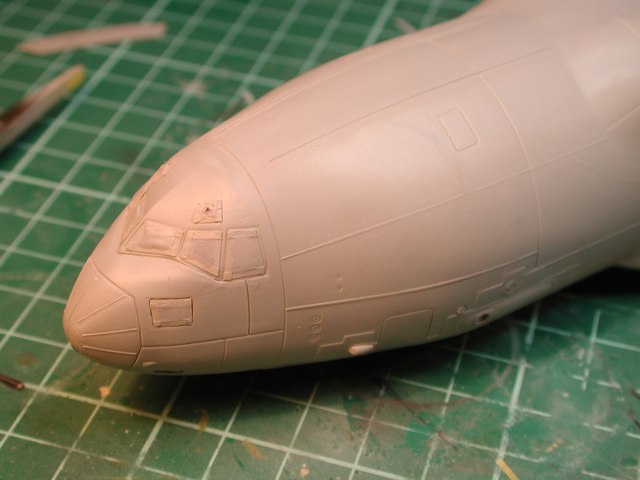
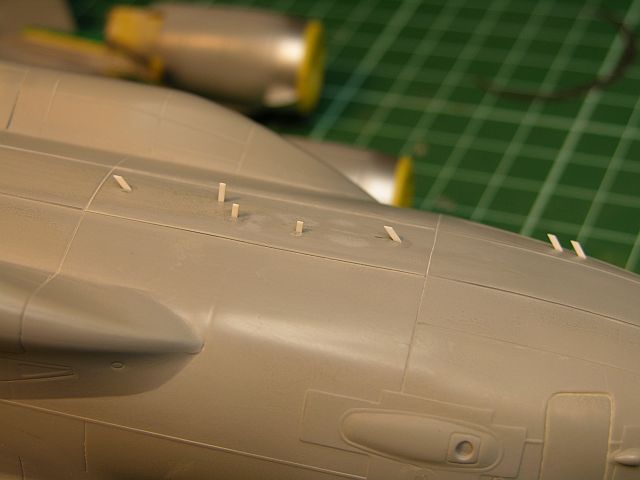
Some minor additions are needed to the Revell kit to accurately model an RAAF aircraft. One very obvious one are the small oval shaped windows in the nose just above the wheel

Creating the oval windows to a few simple steps to accomplish.
Step 1 Using a template, mark the location and shape of the window on the model with pencil

Step 2 Chain drill the interior of the section to be removed
Step 3 With a sharp #11 blade, carefully cut away the un-wanted plastic and trim to shape
Step 4 As the cutout had to have a clear window attached, we need to thin the plastic from the inside using a dremmel tool
Another enhancement required for the RAAF birds is an additional landing light above each ECM blister on the forward fuselage side. Here You can see I have drilled the hole (it round so easy to make), thinned the plastic and attached the clear part as well as some Bare Metal foil to simulate the lights lens from the outside

The end result can be seen here with the oval window and new shiny landing light in place

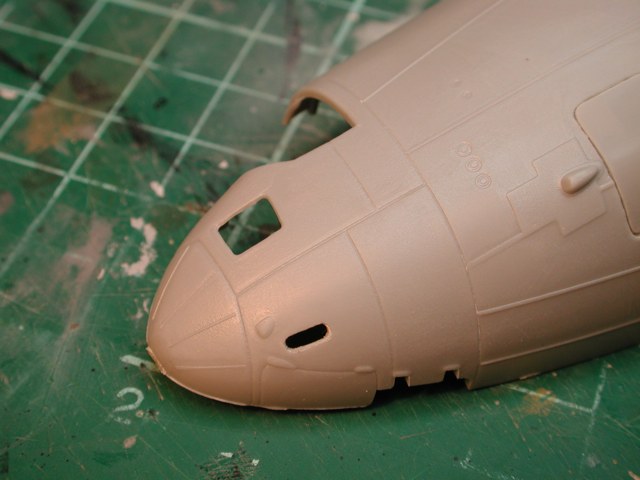
As we now had two windows in the nose section on either side, I decided to scratch build some blanking plates (which would be painted black) avoid an "empty" look from the outside

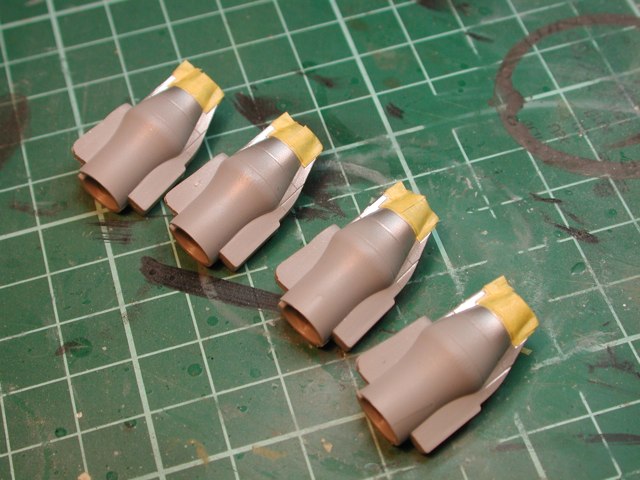
With the fuselage coming along nicely, it was time to turn my attention to the engines. Here the interiors have received a coat of Alclad Stainless Steel)

The flight deck gets a coat of Tamiya Nato Black

The fuselage for the most part fits very well. Here you seen some tape and clamp used to hold the parts in place while the glue dries

The exterior of the fuselage is made up of 3 pieces. Left, right and bottom (which includes the cargo door at the rear). Here you can see of the bottom section and it rather odd stepped join line. You can also see its not the best fit with large gaps evident

The rear of the bottom section is the actual cargo door. In the closed position, I needed some plasticard spacers to keep it place correctly

With the glue dry, its time to sand and remove the seam. As the C-17 has raised ribbing that runs along the fuselage length, I had to be careful not to destroy these when sanding the seam. Even though this photo is out of focus, you get the idea of what I was doing with the tape to protect the raised panel detail

The forward bottom section seam has now been sanded and filled. An unavoidable casualty of this process was the two raised ribbing sections. You can clearly see I have completely removed the raised ribbing in the area for now to concentrate on the seam work

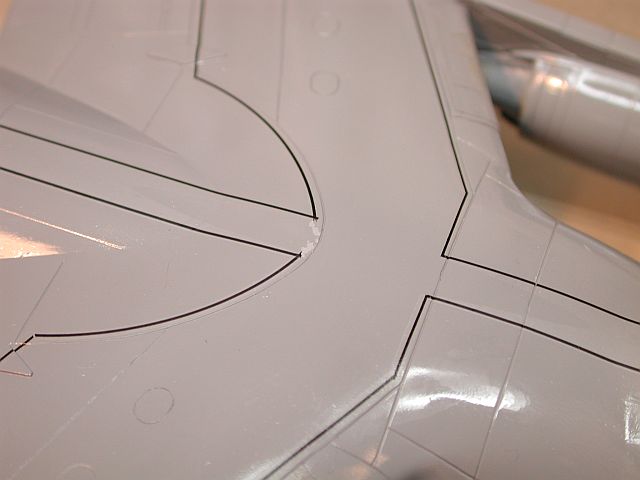
I needed to re-scribe the cargo bay door join line and did so using my Pactra tape as a guide for the scriber

As with the cargo bay door, the panel line on the very top fuselage also need re-scribing following the sanding of seam removal

With the seam work complete, it was time to replace the raised ribbing. I did so using stretched sprue. Here you can see one of the ribs being held in place with tape. Thin liquid glue is then applied with a small brush

The other place where is was unavoidable to remove the raised detail when sanding the seam was on the nose cone. Here stretched sprue is being used to replace the top and bottom ribs. If you think I have made a mistake because the top/bottom ribs look too long compared to the others, check your reference pics and you will see that they are indeed longer (I know, I checked !!)

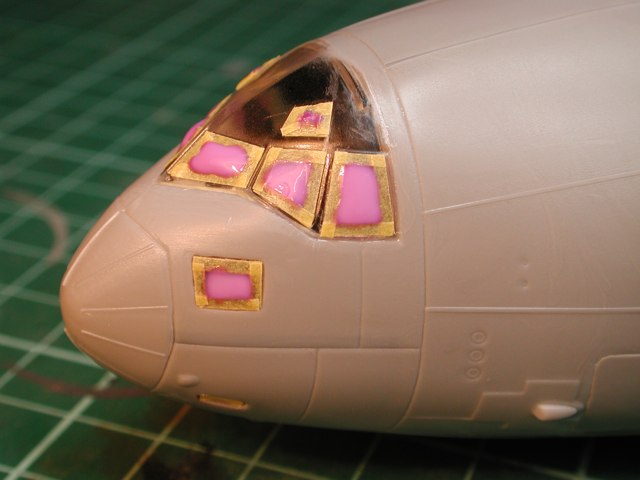
With the canopy clear part attached and the rear seam sanded in, its time to mask off those annoying tiny windows
A coat of primer is applied to check for problems. Luckily non appear to be evident (sometimes you get lucky)
Returning to the engines, its time to begin layering the various shades of Alclad to the engine interiors. Having to mask and paint four engines makes the job seem that much harder
Under the tip of the tail on RAAF aircraft can be found some form of sensor or antenna. I am not sure if this is specific to RAAF aircraft, but it was reasonably easy to create it via plasticard

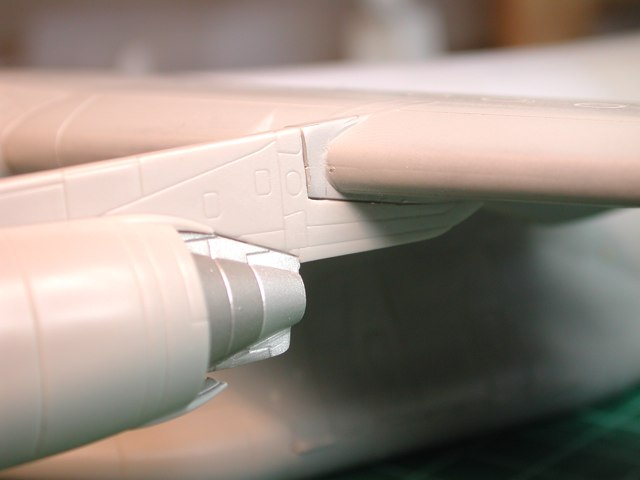
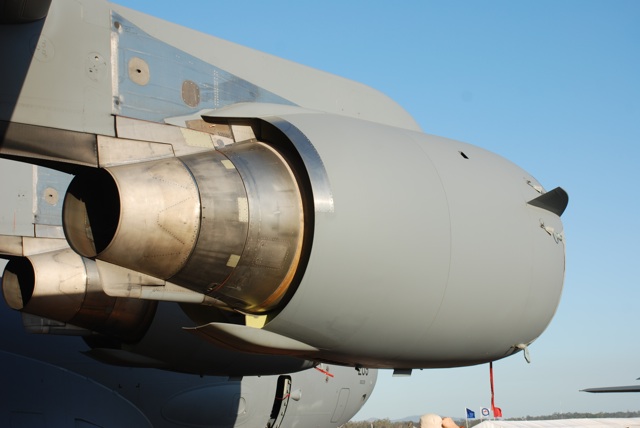
A distinctive feature of all C-17's is the bare metal finish applied to the underside of the flaps (only directly behind the engine exhaust). Sections of the leading edge flaps that are adjacent to the engines are also bare metal. Here Alclad Stainless Steel has been applied to simulate this

The Alclad clearly seen from above. Remember to always apply Alclad over a primer as it does not stick very well (in my experience) to plastic

With the painting complete of the engine interiors, its time to glue them up. A combination of Alclad White Aluminium and Duralium was used

With the wings attached and the join lines completely removed, its time to add some more simple detailing. I am not sure what these are, but the look suspiciously like reinforcing plates

The engines are all together. The fit is pretty good, with only the intake lips causing any gap issues. This seam has to be filled anyway because it does not fall on a natural panel line

I had originally intended to leave the engine off the model until all the painting was complete. This idea may change as the fit of the engines to the wings leaves a lot to be desired. I had to spend a lot of time trimming and sanding each engine to get it to look this good
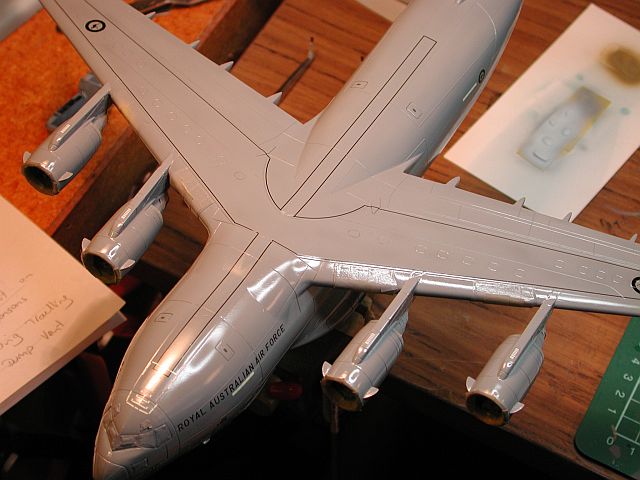
With the main airframe complete, it was time to make up the stand and here we see the model (minus engines) as she will be when complete

As I said previously, the seam between the body of the engine and intake lip needs to be completely removed. Here you can see the super glue I have used as a filler prior to sanding this seam

The intake lip to engine body seam has now been sanded. Next step is to prime it and make sure it has disappeared for good

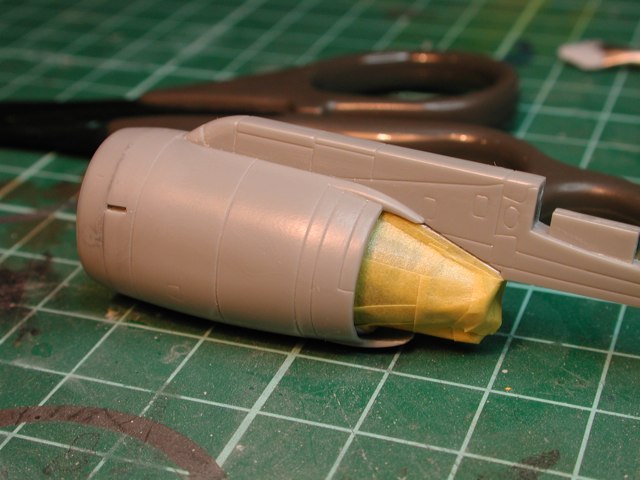
The previously painted engine exhaust has been masked in preparation for future engine body detail and final painting
To ensure the static dissipators are placed in the right spot with accurate spacing, I have marked out the locations on some Tamiya tape and am using it to transfer the marks to the model. The actual dissipators will be attached later from stretched sprue

The engines have several sections of distinctive bare metal. The photo shows the parts that need to be painted bare metal quite clearly
The engines have progressed to the point where the bare metal sections need to be painted and masked. Here we see all four engines. Notice that the small "wings" on the leading edge of each engine have been attached as well. Check your reference photos carefully to get the right angle on these

A closer view of the engines. The paint used here is Alclad Stainless Steel. Many of the Alclad range can be masked directly with no ill effect. I have found that the more polished tints suffer badly when masked unprotected. I therefore have started to clear coat these Alclad colors with Future before masking

With the Future dry, its time to carefully mask the metal panels on the engine nacelles. I chose to mask all the engine metallic section before attaching to the wing

The engine is test fitted to the wing. Note the masking applied to the metallic sections of the wing leading edge

The underside of the flaps behind the engines are also left as bare metal. Here they are being masked prior to painting

To ensure the engines don't sag due to gravity while the glue dries, I have stood the model on its tail to get gravity to help, rather than fight me

With the glue dry, we can see all the masking on the engines and the wings. Almost ready for some paint

The C-17 has several antennae under the front of the fuselage. Here I have created them from plasticard
All C-17s are painted in Air Mobility Command (AMC) Grey FS36173. Xtracolor (sold by Hannants) has this exact color in their range. In Australia we have at least two hobby shops that sell Xtracolor so I was able to obtain a couple of tins. I got extra as I have an Otaki C-5 Galaxy in my collection which will be built one day

One feature of the Xtracolor enamel range is that they are high gloss. This means we can decal directly onto the paint without the need for a gloss coat. One of the bad things about gloss paints is that they are harder to apply (watch out for the orange peel effect) and take much longer to dry

Whilst the paint was drying, I turned my attention to scratch building the upper antennae. Here we see the 3 stages of turning some stock plastic strip into an antenna

The antenna have been built and now await a coat of primer

Decaling is proceeding. The Revell decals (as previously when I built the Rafale) have proven to be terrible. I gave up on the wing walkway decals and used some black pinstripe Superscale decals I had in the spare box. I am quite concerned that lurking under the Revell decals that I had to end up using are a myriad of air bubbles just waiting to silver. REVELL, PLEASE INCLUDE DECENT DECALS IN YOUR OTHERWISE EXCELLENT KITS

I had an email recently where I was thanked for including details of when I screw something up. Well here is a good example. When I was placing the two curved decals in place I made them join in the middle. Of course they are not meant to join, but rather link up with the ends of the rear fuselage walkway decal as shown here. You can see where I have attempted to scrape away the decal and managed to remove the paint as well (groan). I'm hoping this will recover with some touchup paint
Xtradecal have generally done a great job with the RAAF 36 Sqn markings. One thing that was bought to my attention on the Aussie Modeller forum was that the two fuselage kangaroo roundels as supplied by Xtradecal are too large (they should not be the same size as the wing roundels). I dug into the spares box and found a surplus 1/72 F-111 sheet which had lo viz roundels of roughly the right size. Here you can see the F-111 roundels next to the larger Xtradecal wing roundels

Decaling is now complete. To prepare for the panel wash, a coat of Future has been applied
The panel wash (Burnt Umber) has been applied. In retrospect, I think I should have used a darker (say Gunship Gray) wash as the Burnt Umber looks too brown

Actually, once I removed the surplus wash, the panel lines looked a lot better (never count your chickens before they hatch). Here you can see the scratchbuilt antennae being applied to the spine of the fuselage

With the flat coat applied, its time to work on the weathering. Using some reference pics I found of a USAF C-17, I applied some moderate exhaust weathering to the upper wings.