B-26B-50 Invader
ICM (48281)
1:48
Reviewed: Nov 2019

Although a hangover from World War 2, the seemingly antiquated Douglas B-26 Invader 'bombing twin' proved to be one of the hardest-worked assets employed by United Nations forces in Korea for the duration of the conflict. Capable of dropping bombs and napalm, firing off unguided rockets or simply strafing targets with its battery of up to 14 nose-mounted 0.5-inch Browning M-3 machine guns, the B-26 was equally as effective either during the day or night. Indeed the vast percentage of Invader missions were flown during the hours of darkness, for it was the only USAF ground-attack aircraft capable of attacking truck convoys and trains with precision. Over 200 bomber and reconnaissance variants saw action in Korea and many were adorned with some of the most colorful nose-art ever carried by American combat aircraft in any war.

B-26 Invaders of the 3d Bombardment Group, operating from bases in southern Japan, were among the first USAF aircraft engaged in the Korean War, carrying out missions over South Korea on 27 and 28 June, before carrying out the first USAF bombing mission on North Korea on 29 June 1950, when they bombed an airfield outside of Pyongyang.
B-26s were credited with the destruction of 38,500 vehicles, 406 locomotives, 3,700 railway trucks, and seven enemy aircraft on the ground. On 14 September 1951, Captain John S. Walmsley, Jr. attacked a supply train. When his guns jammed, he illuminated the target with his searchlight to enable his wingmen to destroy the train. Walmsley was shot down and posthumously awarded the Medal of Honor. Invaders carried out the last USAF bombing mission of the war 24 minutes before the Armistice Agreement was signed on 27 June 1953.
In addition to the standard attack versions of the B-26 which flew night interdiction missions, a small number of modified WB-26s and RB-26s of the 67th Tactical Reconnaissance Wing flew critical weather observation and reconnaissance missions in supporting roles.

IN THE BOX - ICM 1:48 B-26B-50 Invader (48281)
ICM have been working on a new family of 1:48 A-26/B-26 Invaders for some time now. This release has been highly anticipated given the quality of their recent new toolings including excellent kits for the MiG-25, Ju-88, He 111 and Do 17/215. Until now the only options for Invaders in 1:48 were the older Monogram kits, released in the early 90's. Whilst these are considered a solid kit they are clearly starting to show their age.


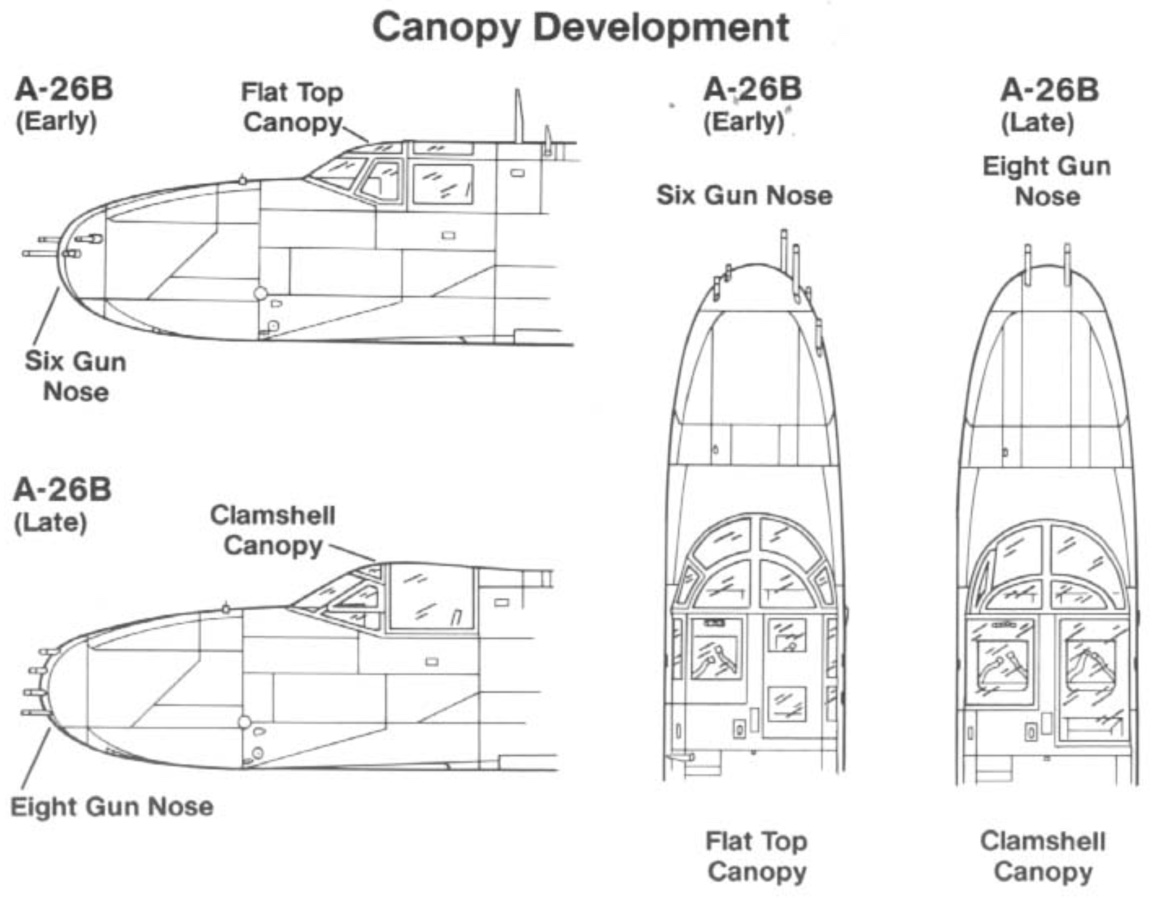
First up ICM have chosen to give us the 8 gunned solid nose B-26B-50 Invader, used heavily during the Korean War. The B-26B-50 was the late variant of the solid nose Invader which had eight (8) 0.50cal machine guns mounted vertically in the nose. It's a smart move by ICM as this variant was never done by Monogram and only ever available as resin conversions by Cutting Edge and others.
ICM have already announced the next kit (due December) being the early solid nose A-26B-15 which had six (6) nose guns. I have not as yet seen any plans from ICM to box the glass nosed A-26C bomber variant, although that seems logical, given how easy this would be to do. Finally I'm sure we are all desperately hoping they will do a new A-26K Counter Invader as this subject was also never done by Monogram. This would require a bit more effort given the differences between the B-26B and B-26K. Here's hoping.

The size of the Invader box is similar to the ICM He 111 kits, just a bit deeper. I would classify this as an intermediate skill kit and as I have observed before the ICM engineers seem to have found just the right balance between kit complexity and acceptable detail. I find the ICM plastic to be quite soft and therefore very easy to work with. The surface panel-line detail on the Invader is very delicate and restrained and unfortunately ICM are not big on providing rivet detail, which is a pity as I personally like more detail rather than less.
HANDS ON - ICM 1:48 B-26B-50 Invader (48281)
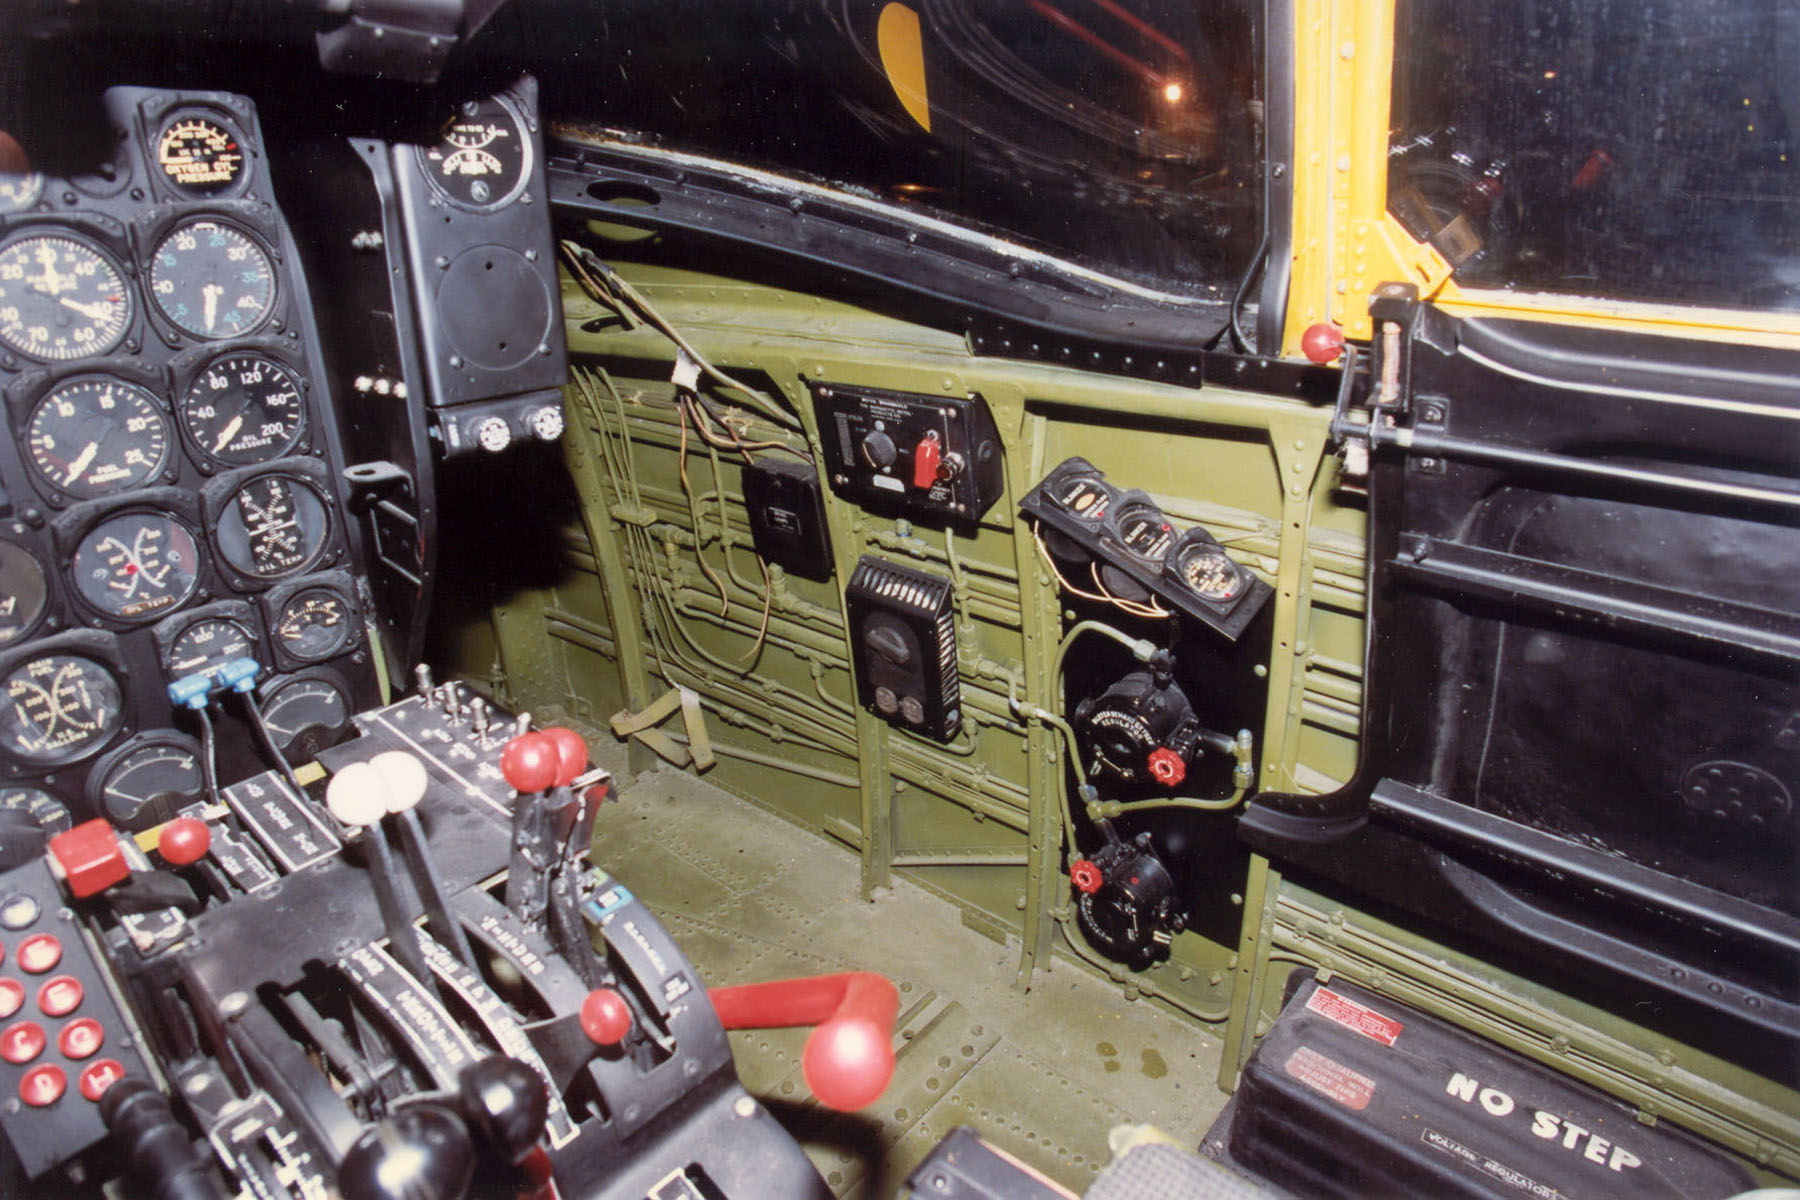
Much like the A-20 Havoc before it, Douglas designed the Invader to operate with a minimal crew. Sporting a single pilot station which looked more akin to a fighter cockpit than a twin engined attack/bomber, the Invader had a standard crew compliment of 3, which was half of other contemporary USAF medium bombers such as the B-26 Marauder which operated with 6-7 crew members. The forward crew compartment provided room for the navigator (later bombardier) as well as much of the radio and hydraulic systems.


ICM provide all the major parts you would expect to be found in the Invader cockpit and as I expected the fit was excellent. Decals are provided for the main instrument panel and several of the other side consoles. I feel the overall realism of the cockpit could have been improved if they had included some simple rivet and panel detailing on the floor. The real aircraft has very obvious lines of raised rivets and access hatches. Monogram provided this in their kit so I can't see why ICM left it out.


The raised detail on the front and side panels is nicely done and will be appreciated by those who prefer to hand paint their cockpits rather than use decals. I have one of the original Eduard PE sets designed for the Monogram kit and based on some test fitting am confident I can make it work with little effort on the ICM parts. The N-9 Gun-Bomb sight (not shown here) is included by ICM but no reflecting glass is provided. This can be simply added from some clear sheet if so desired.

Most photos show the Invader crew areas painted using standard ANA 611 Interior Green. For modellers FS34151 is believed to closely match ANA 611 Interior Green and is readily available from most popular model paint manufacturers. As an aside, while the raw yellow-tone Zinc Chromate was technically a very effective anti-corrosion primer, it was found to be less suitable for crew areas. The bright interior surfaces coupled with bare metal surfaces underneath caused excessive glare and eyestrain for the crews. In September 1943, the US Navy specified a Zinc Chromate and Lamp Black mixture to a colour standard, which became ANA 611 Interior Green. The instruction was an after-the-fact attempt to standardize a variety of greens being used to paint crew areas. [source: ipmsstockholm.se]

Like most kit cockpits there is plenty of scope here for extra detailing and corrections. I personally plan to do some work on the pilot seat (adding the arm rest and support braces etc) and some wiring to the side panels. I believe this effort will be worth it as the clam-shell style canopy provides an excellent view of the interior of the model.


Whilst the pilot had a very comfortable station the navigator/bombardier was not so fortunate. He got a rather uncomfortable looking fold down chair. ICM have done a credible job of reproducing this seat with only the overscale plastic thickness detracting from the effect. I plan to model the seat in the stowed position (folded up against the wall). The large empty area directly behind this seat is an access hatch to the bomb bay which could, with extreme caution, be used in flight to traverse from the front cockpit to the rear gunners position if needed.

As can be seen from these pictures there is extra detail on the left cockpit wall that could be added from plasticard and wire to add interest to this part of the interior. As always its upto each modeller to decide how far they want to go, but having handy reference photos like this does not hurt.


Compared to the nice job that ICM have done for the front part of the cockpit with the pilots station, the rear of the cockpit looks like a very poor cousin. All we get is a couple of half cylinders molded into the rear bulkhead and when you look at what this area should look like from photos it's pretty disappointing. A quick comparison to the 1990's Monogram kit even puts this effort by ICM to shame.

These photos from the pilots manual show what the rear cockpit area should look like. I realize there is no way ICM could reproduce all this detail in plastic, but I know they are more than capable of doing better than what we ended up with.


The Invader interior consists of three major compartments. The cockpit, the bomb bay and the gunners compartment. Much like the real aircraft, ICM provide two wing spars which will later slot into the wings to provide a very solid mating. The alignment of the internal bulkheads was quite positive with no slop once you join the two fuselage halves together.

The gunners compartment sits to the rear of the bomb bay and is dominated by the telescopic "sighting station" which remotely controlled the two (upper and lower) turrets. ICM have done a good job on the sidewall detailing here.


The sighting station provided by ICM is a good starting point for some extra detailing. Its a bit basic for my taste but once you install it into the compartment and add the top cover its likely that very little will be seen from outside. I think a few minutes adding some copper wire cabling will be time well spent.


For the nose gear bay ICM have again followed Monograms lead by molding the doors and the interior side walls as one piece. On the bright side the fit is very snug and it means you can't misalign the hang of the doors. On the down side it means you will need to build and paint the model with the external doors attached. I'm not a huge fan of this idea as I'm sure I'll end up damaging at least one door during the build. As you will see later in the review they have done the same thing with the main wheel well doors which attach to the engine nacelles. So that's six doors I'm going to have to try and avoid, good luck !!


Once the interior work is complete the fuselage halves can be bought together. The wing spars align with holes on each wing root and help to give the model a degree of rigidity. The bomb-bay bulkheads (especially the front one) will need some additional work to correct issues if you feel so inclined. The center bulkhead can benefit from having the center and lower sections drilled out to make them look more realistic.


Another area that I feel ICM have dropped the ball is in the bomb bay sidewalls. It's so obvious that the internal ribbing just stops when it reaches the central wing root area and even the bomb racks don't do enough to cover it up. I'm going to have to cover cover this section with plastic sheet and add in the ribbing properly. ICM could have provided an insert to do this (much like I have seem KittyHawk do) rather than leave this as is.


The gunners compartment had a crew entry door on the starboard (right) side. I noticed that while ICM provides a cut out for the window, the outline of the door itself is missing. I also initially felt the shape and orientation of the ICM window was off, mainly because I compared it to the Monogram kit. I then did some more digging and found a photo (below left) of a Korean war invader with a door window roughly the same shape and size as the ICM kit. The window seems to be painted over (or blanked off) but it certainly looks to be close to the ICM design. So, it looks to me like the shape of the windows on the gunners door varied and I would not be rushing to suggest you need to correct this specifically. As always do your own research till you are happy.


Regardless of how you decide to orient the window you will need to scribe at least one panel line on the left (aft) side of the window to represent the outline of the crew door. This is super simple and for most will be all that is needed.


The other item I noticed missing from the ICM kit, which is present on the Monogram kit, is the small door for the pilot boarding ladder and spring loaded pop-in steps. These doors are located on the starboard (right) forward fuselage just ahead of the wing leading edge. They allowed the pilot to climb up and onto the wing and from there into the cockpit.

A quick comparison of the two kits show the missing detail. I plan to use the Monogram kit as a guide to help me scribe the panels onto the ICM kit surface. Somewhat ironic that the old kit is teaching the new kid some tricks.


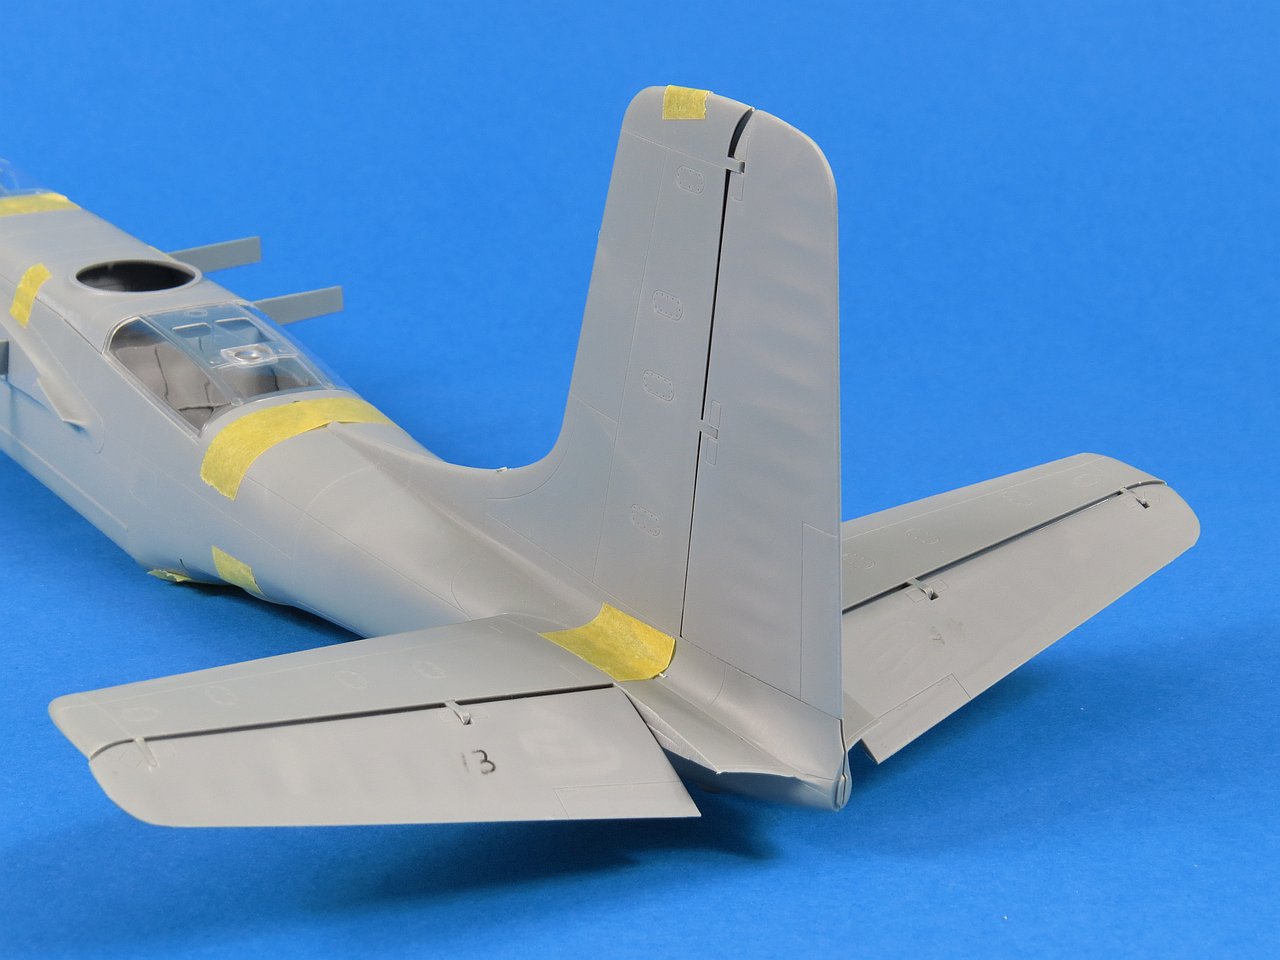
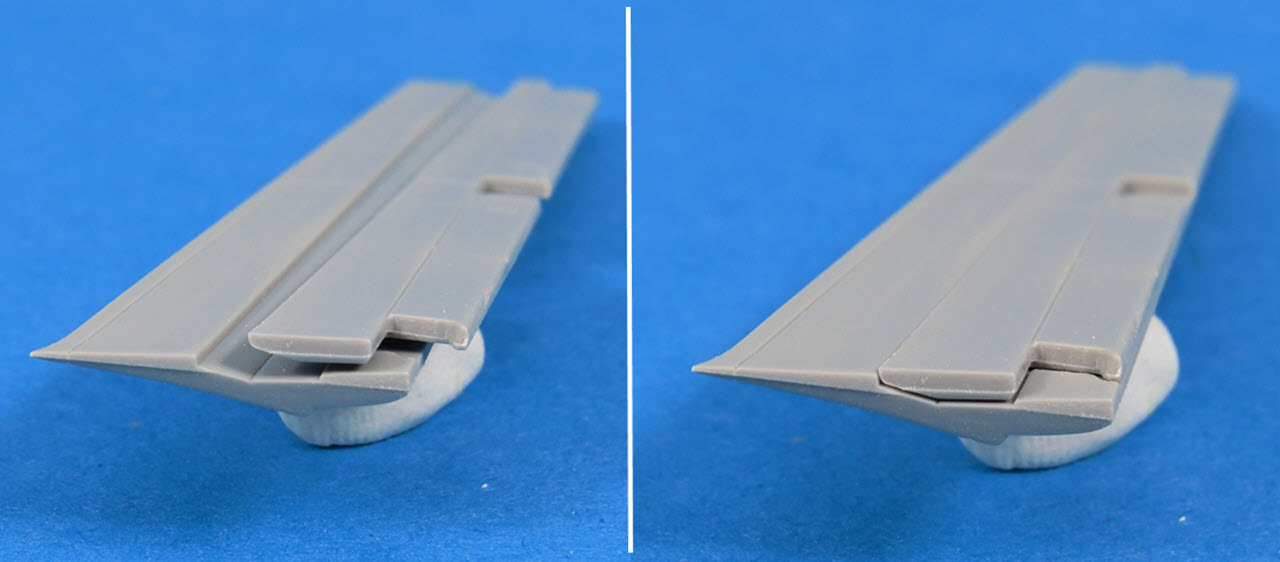
ICM is pretty consistent with providing separate control surfaces on their 1:48 kits. The elevators and rudder (as well as the ailerons and flaps) are all included as separate assemblies for the Invader.

The join of the horizontal tails to the fuselage is close to perfect, even with no glue. The hinges on the rudder and elevator allow for enough movement so as to be able to position them in a relaxed (drooped) state as seen here.
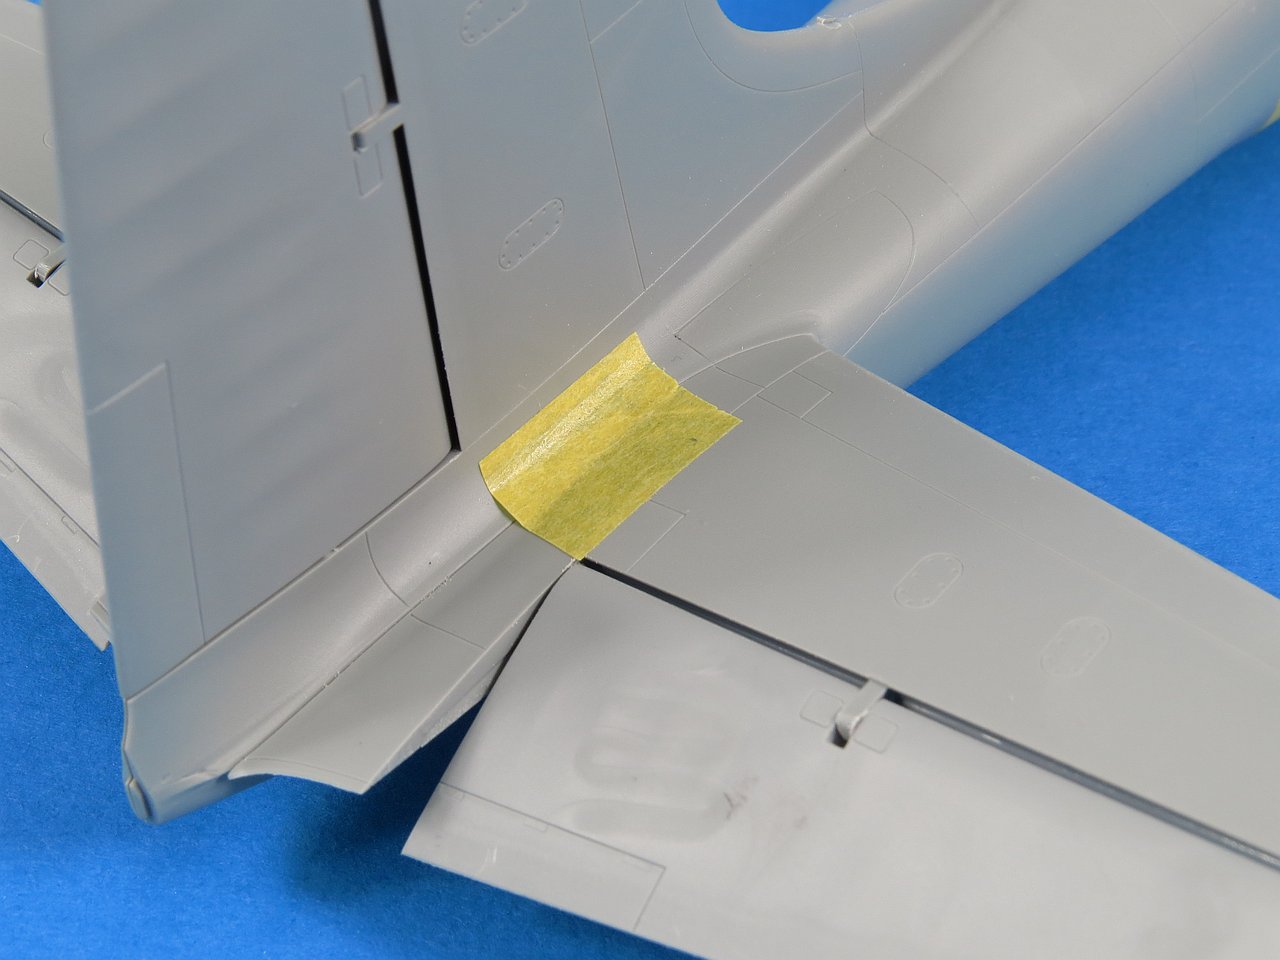
The horizontal tail-planes on the Invader had 10 degrees of dihedral and ICM have designed the mating surfaces to match this. The fit and alignment is spot on and only a drop of liquid glue will be needed to finish this off. Notice the restrained surface ribbing on the fabric covered rudder and elevators. I'll be curious to see how this looks after paint as it's very subtle.
Here we have a perfect picture of Invaders in formation showing us the very distinctive tail dihedral from the rear.

The main physical difference between the Invader variants was the nose. The A/B-26B had a solid nose with different configurations of 0.50 cal guns. The A/B-26C had a glass nose installed to allow for precision bombing. Interestingly ICM has put the parts for the nose onto one of the main sprues (E). This seems to imply that for later boxings (B-15 or C) they will ship a new sprue E or smaller supplemental sprues for the new nose parts. Take particular note of the need to put weight in the nose of your Invader. Failure to do so WILL result in a major tail sitter.

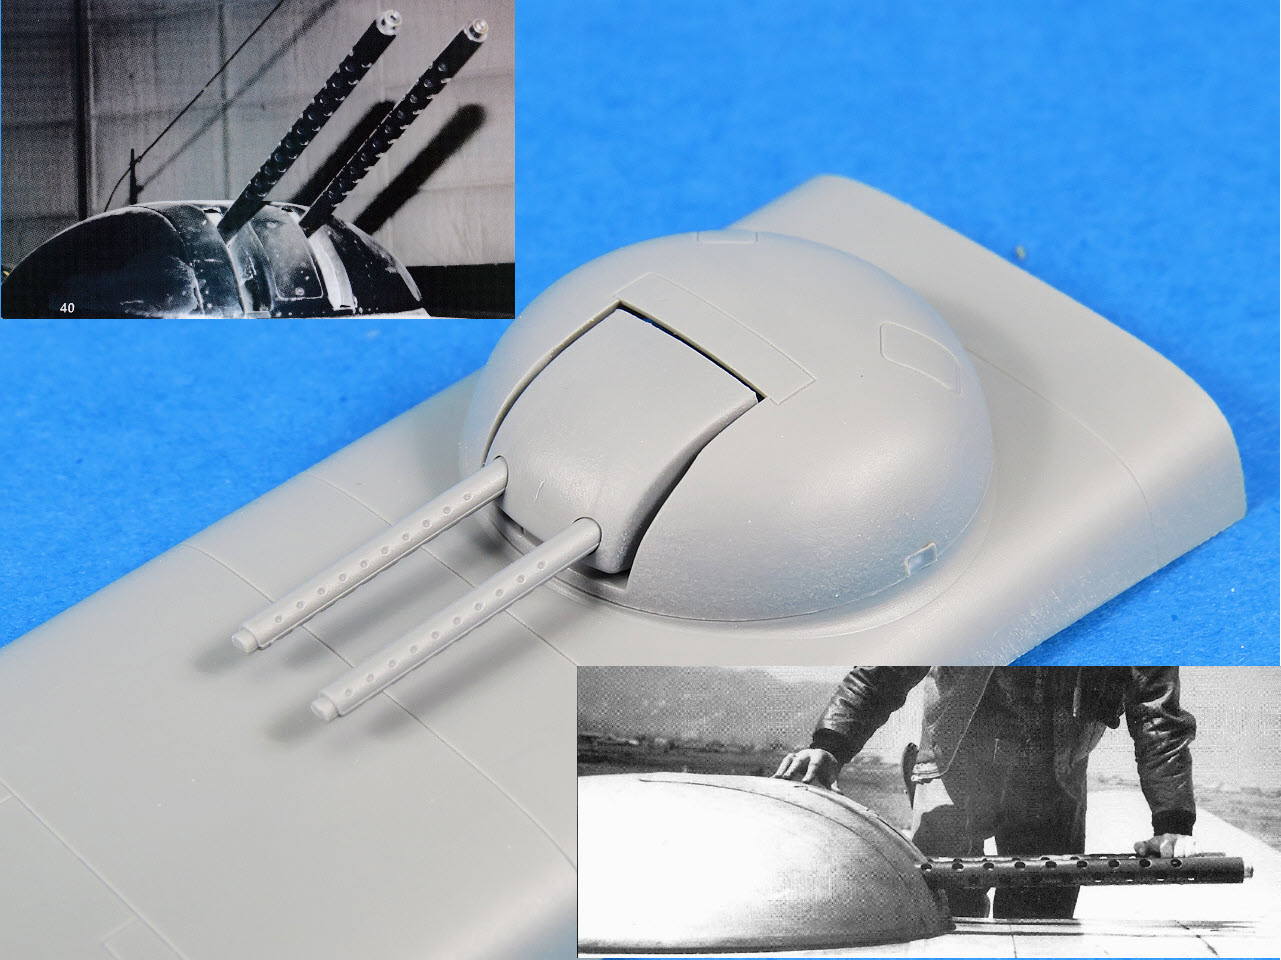
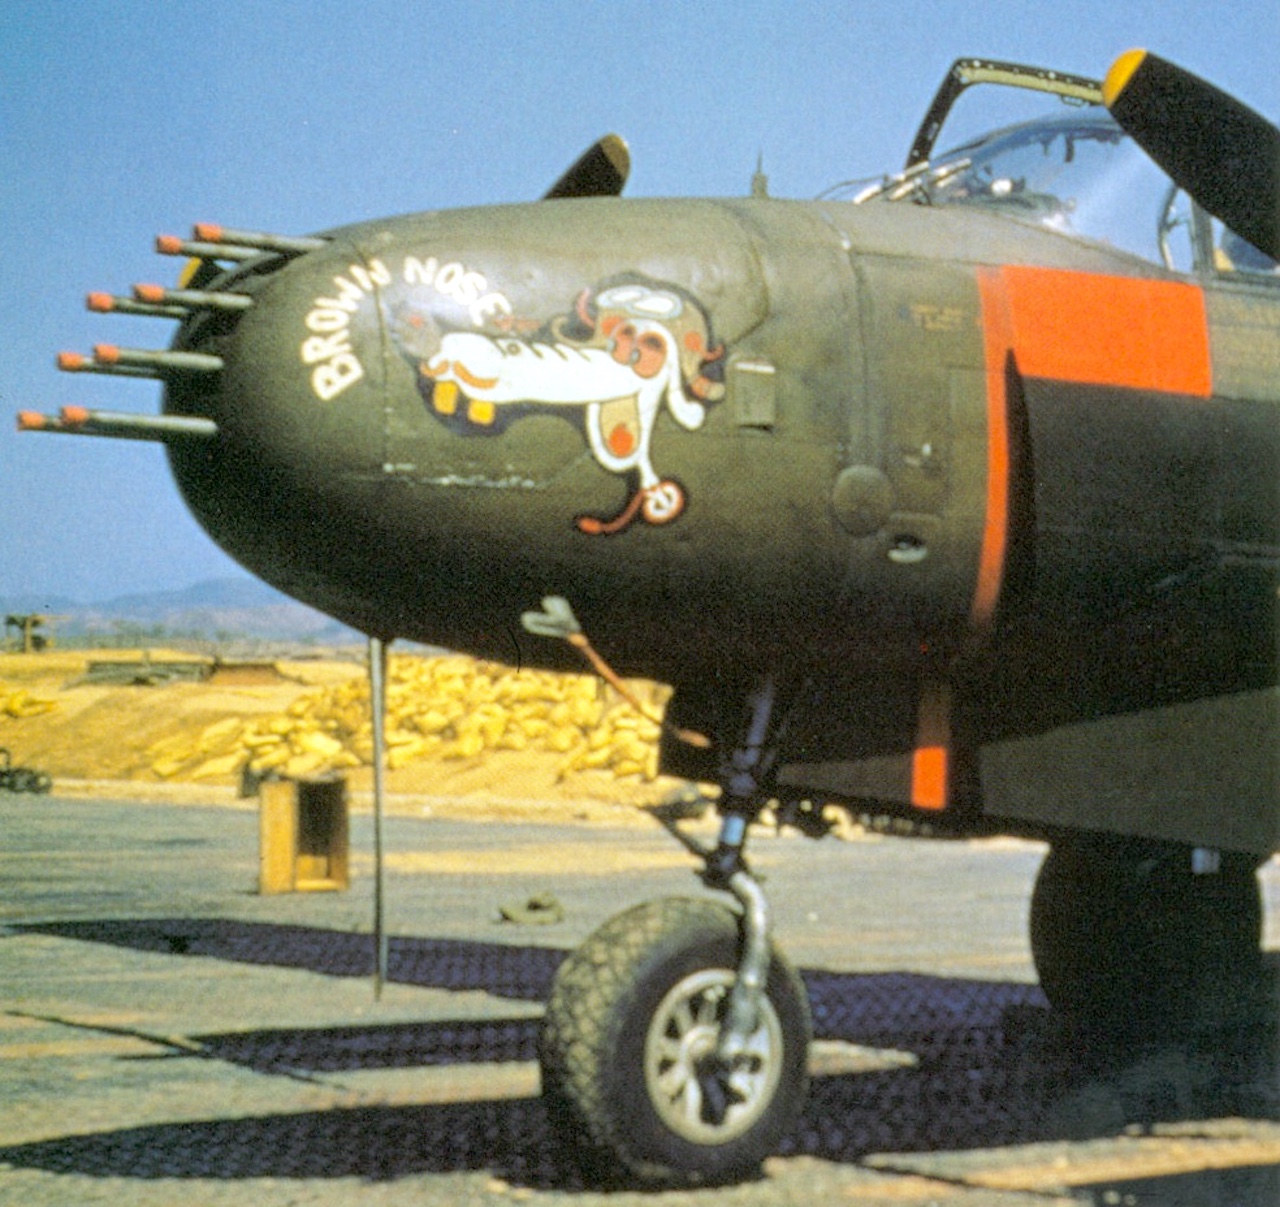
The external part of the nose (and wing) mounted 0.50 cal gun barrels were covered by metal blast tubes. As a result the barrel and its distinctive cooling jacket were not actually visible. This makes ICM's job considerably easier as they do not need to mold the barrel detail rather just provide smooth tubes. As expected the tube ends are not drilled open on the kit parts but even that is not a major problem because most photos of Invaders in Korea show the barrel ends covered over with protective caps.


The general shape and detail on the nose parts looks to be accurate. There are a couple of seams that do not fall on actual panel lines so you will need to fill and sand these. ICM suggests you assemble the nose as a single unit and then offer it up to the front fuselage. I will probably deviate from this order and attach the sides (E26 & E27) to the fuselage halves first and once the fuselage halves are joined attach the top (E35) and bottom (E33). My test fitting showed that which ever way you do it the fit is pretty good.

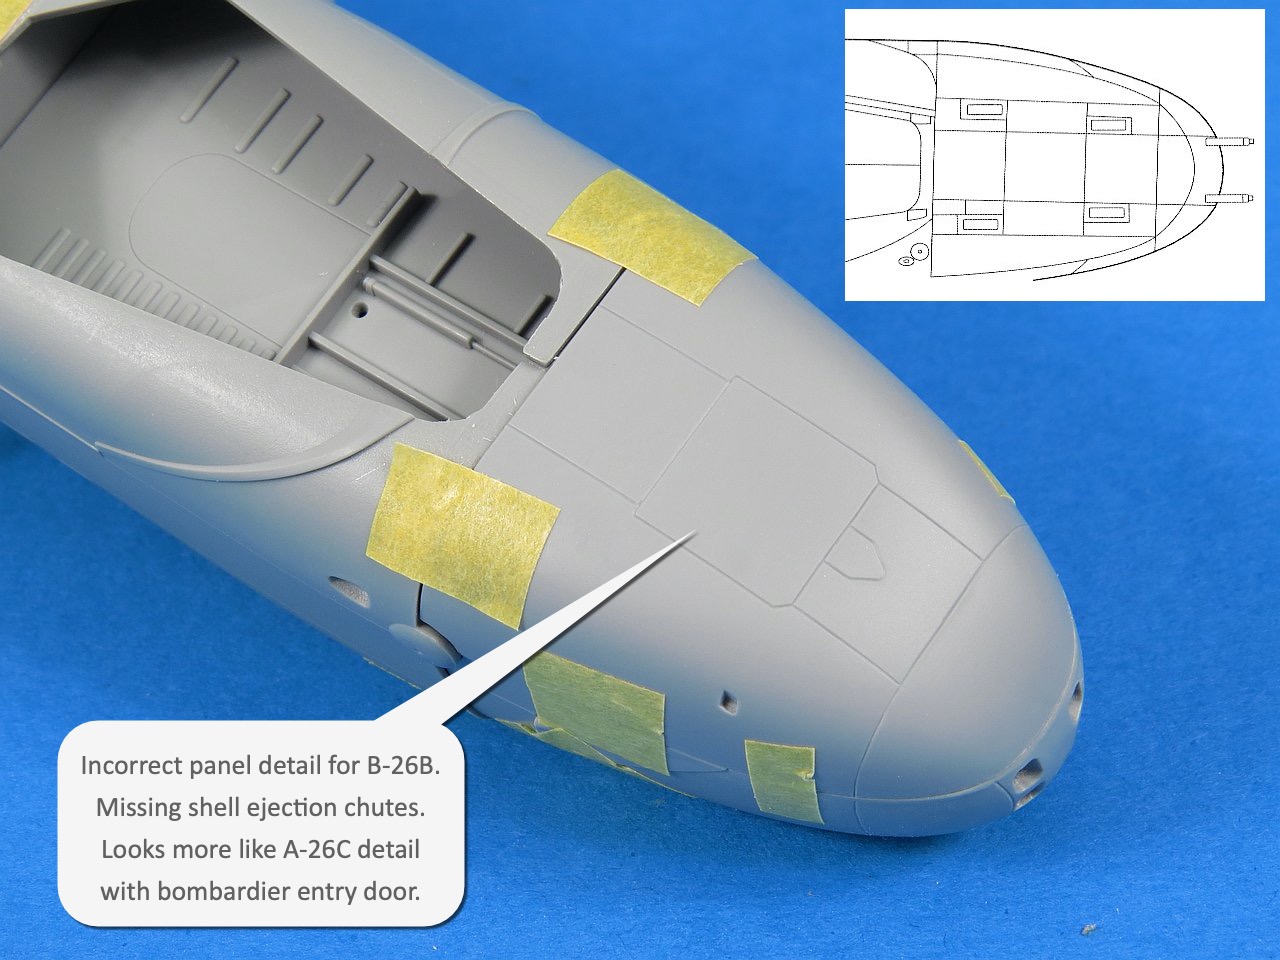
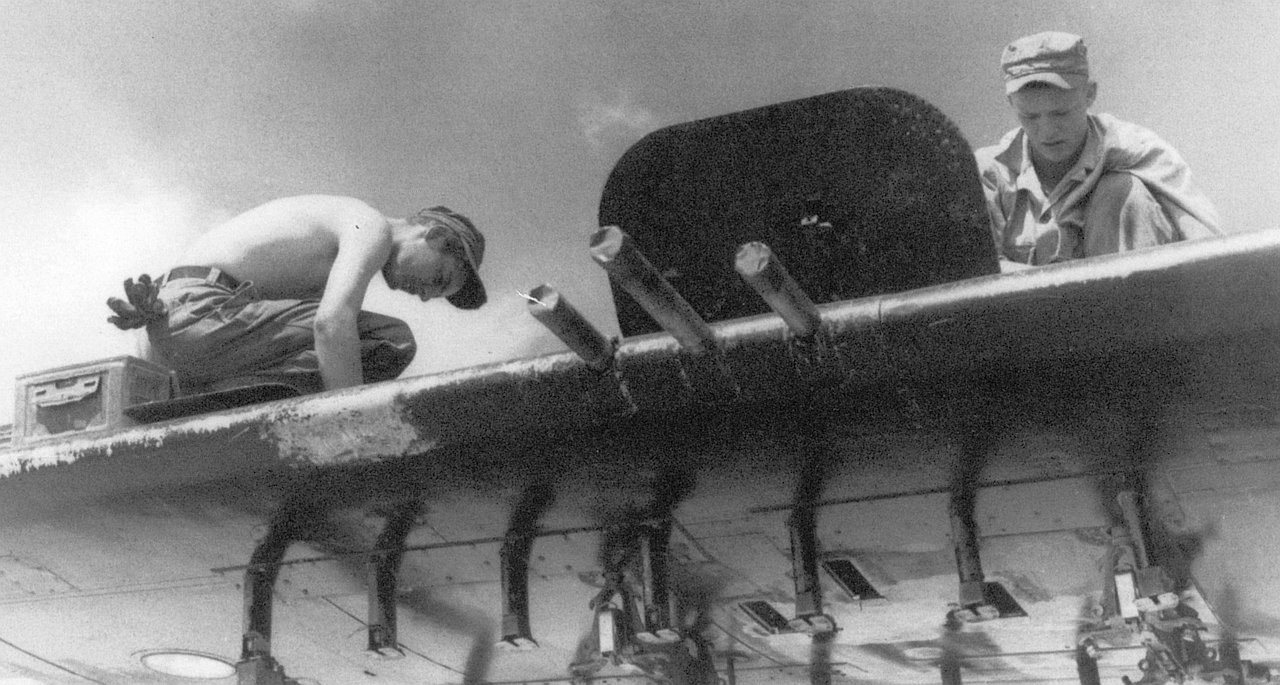
The Invader came with three (3) different nose configurations across the B & C models. For this kit we have the B-26B-50 (and later the B-26K) nose configuration with eight (8) 0.50 cal guns. Having belt fed machine guns means lots of spent shell cases and belt links that have to be ejected out of the aircraft somehow. The gun nose Invaders therefore incorporated four (4) ejection chute holes on the bottom of the nose as shown in the diagram.

Comparing the panel line detail on the ICM lower nose part shows that it's a closer match to the C model (glass nose) which has a crew entry door here rather than shell ejection chutes as found on the gun nose variants. I'll be filling (with CA glue) and then re-scribing this section to correctly match the B variant.
The Invader could carry a variety of weapons on the wings including 5inch HVAR rockets, which unfortunately ICM do not provide in the kit. Each wing could carry seven (7) rockets and ICM have kindly provided us with cutout markers on the inside of the lower wing part should you source rockets from elsewhere (the Monogram kit for example). The Invader could also carry up-to two (2) x 500 pound bombs and drop-tanks filled with Napalm as well as under-wing gunpods. Each of these options are included in the kit by ICM.
Moving onto the wings and each of the control surfaces are provided separately. No option is given by ICM to display the flaps in the lowered position and I can understand why as the Invader was fitted with double slotted flaps which would result in a very complex mechanism for a 1:48 scale model.

The flaps are molded in two parts and rather than give us a seam along the trailing edge ICM have sensibly designed the join to instead be in the center of the lower surface. This makes the join clean up so much easier and because it's not a panel line the end result is much tidier. Thumbs up ICM.
The fit of the flaps and fabric covered aileron is excellent. Each of these parts simply clicks into place.


The Invader incorporated double-slotted flaps which when deployed extended much further and lower than standard flaps. It also means to try and model these flaps down you will need to do a fair bit of scratch building for the support frames. A good challenge to be sure.


Often times you will see people on the web make blanket claims that such and such an aircraft would never be parked with flaps lowered etc. To help counter that argument, at least in the case of Invaders, I've included this picture to show that this was not always the case. Remember, there are always exceptions to every rule.

Once the wings are complete the time comes to make use of those handy support spars that ICM have provided on the fuselage. Inside each wing are alignment slots which guide the two assemblies into perfect alignment. Another example of thoughtful design by ICM.


While comparing the ICM surface detail with the Monogram kit I noticed quite a difference on the upper wing in terms of access hatch placement and size. Digging a little deeper I found photos (see below) of the open access hatches for the wing mounted guns and ammunition compartments. Once you see that photo the Monogram kit makes perfect sense and the ICM kit makes no sense, at least for an Invader with the internal wing guns fitted. I guess it's possible that the layout provided by ICM was present on some Invaders, I just can't find any evidence to support it.


The engine nacelles are designed to house the main undercarriage and like the nose gear doors, ICM have molded the doors and interior bay sidewalls as once piece. I'm still undecided as to whether this is a good or bad thing. I generally don't like bits and pieces sticking out from the model as I work on it but the idea of having a secure attachment of the doors has merit.

The interior of the nacelle was quite empty which means the top of the bay is very visible. As you can see the real bay is covered with distinctive ribbing and ICM provides none of this detail. I'll be reaching for some 10 thou Evergreen strip styrene to address this omission.


The fit of the door and inner sidewall part is snug. It's not ideal how ICM have molded the lightning holes across the middle of the seam and I believe the best way to fix this will be to make circular discs and glue them to the inside of each hole to cover the seam. Trying to sand and clean the seam will otherwise be a major chore.
With the body of the nacelle complete next step is to marry up the front section which incorporates the engine mount and oil cooler intake.

The forward section of the nacelle includes the oil cooler intake which sits on top. The engine cowling, once fitted, fits up-to this intake flush and the cowl flaps sit over the exhausts around the body of the engine. No problems with fit and alignment here. The parts are molded squarely (no warpage) with alignment slots on all parts. I did lightly re-scribe the panel lines and rivet on this part as they were a bit soft and vague on my kit.

Time now to join the nacelles to the wing. From my dry fit you can see the parts match very cleanly with little or no gap visible. This is always encouraging to see when doing a review as it means less work and frustration for modellers once they start to build the model.


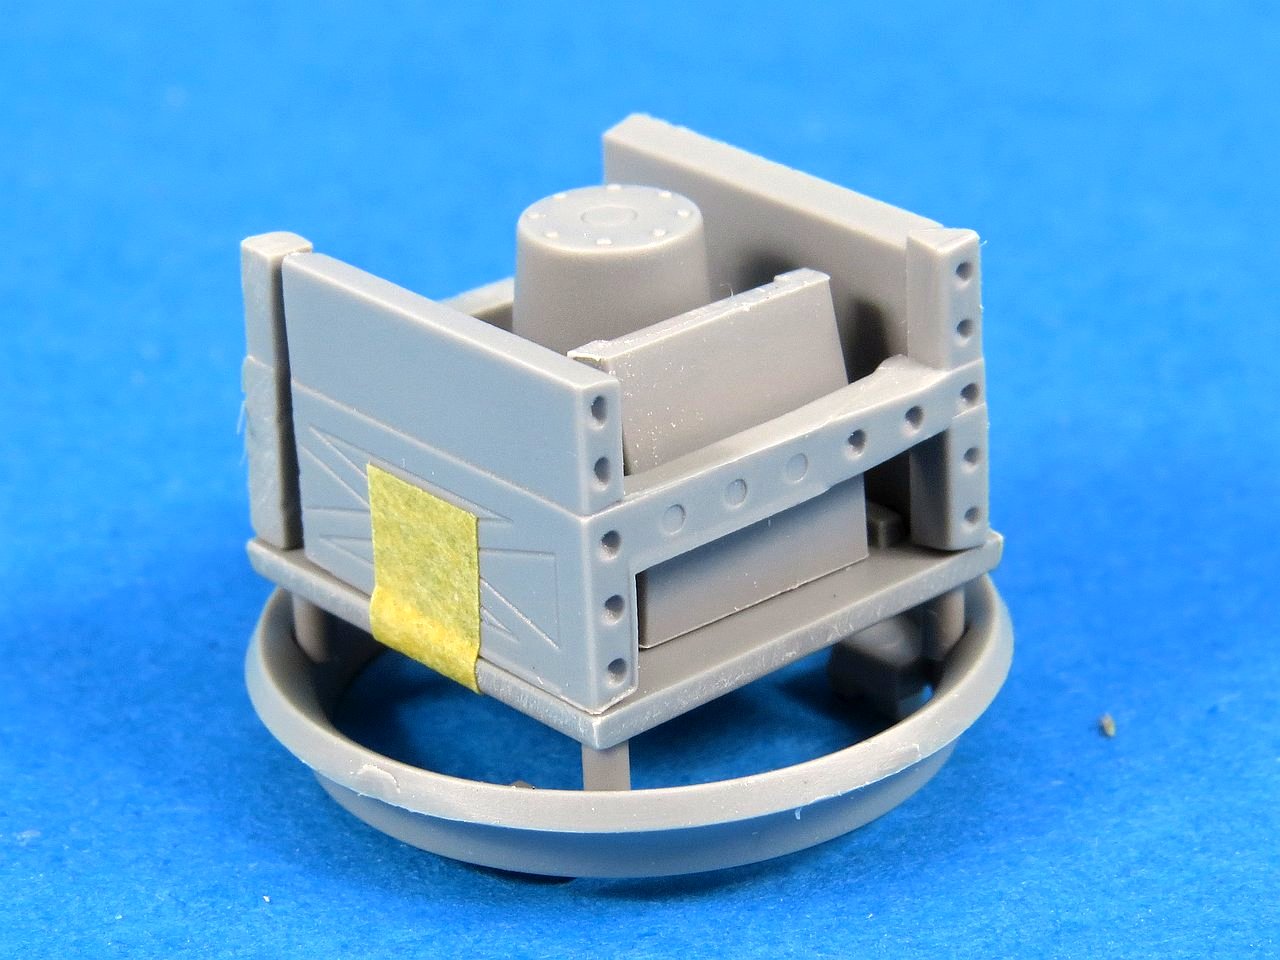
Turning next to the gun turrets, ICM thoughtfully provides the inner components (which are visible in the top of the bomb-bay) for the upper turret.
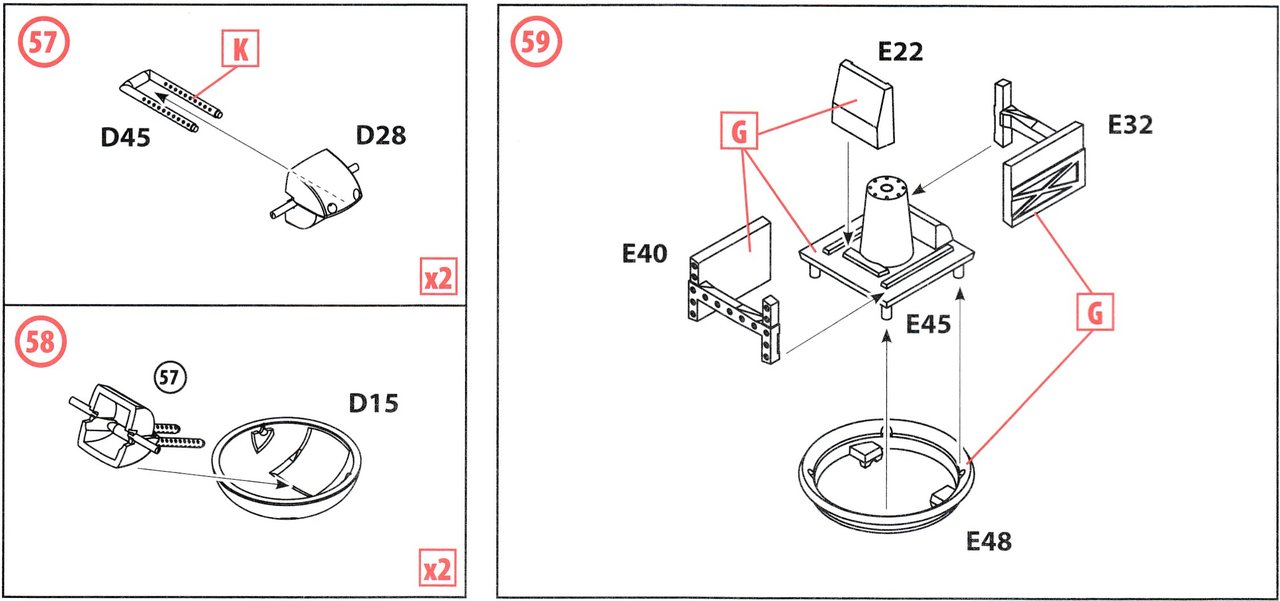
A dry fit of the turret parts revealed some nasty gaps. As this photo shows the detail provided for the .50 cal barrels cooling jacket is very soft and an obvious candidate for replacement with a nice brass barrel from Master Model or similar. When I compared the shape and design of the turret to pictures of the real thing I also noticed that ICM had left out the prominent vertical slots which allow the guns to traverse up and down. As you can see from the two included pictures these slots are quite obvious and I will need to scratch-build them onto the ICM supplied parts. All up, this turret effort by ICM is pretty average.
The lower part of the turret extended into the top of the bomb-bay and primarily contained a sheet metal support structure for the ammunition boxes. Also visible is the shell case ejection chute and control motor for the turret.

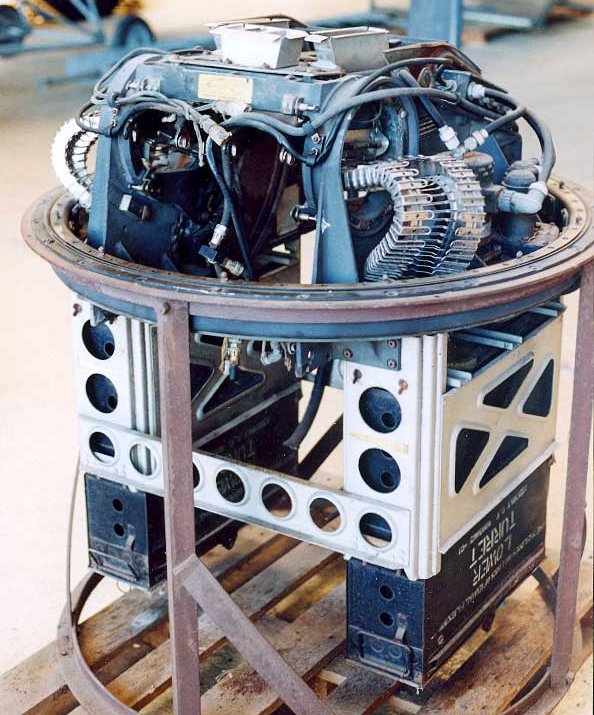
Unfortunately the ICM parts for the inner turret are poorly done. The ammo boxes are missing altogether, the ejection chute is mishapen and the support frame looks very little like the real thing. I do give ICM credit for at least having a go here but they really have dropped the ball on the execution. Most of this will need to be ditched and rebuilt from scratch if you want an end result that looks even close to the real thing. Being buried deep in the bomb-bay I expect most modelers won't bother, and I can't blame them.
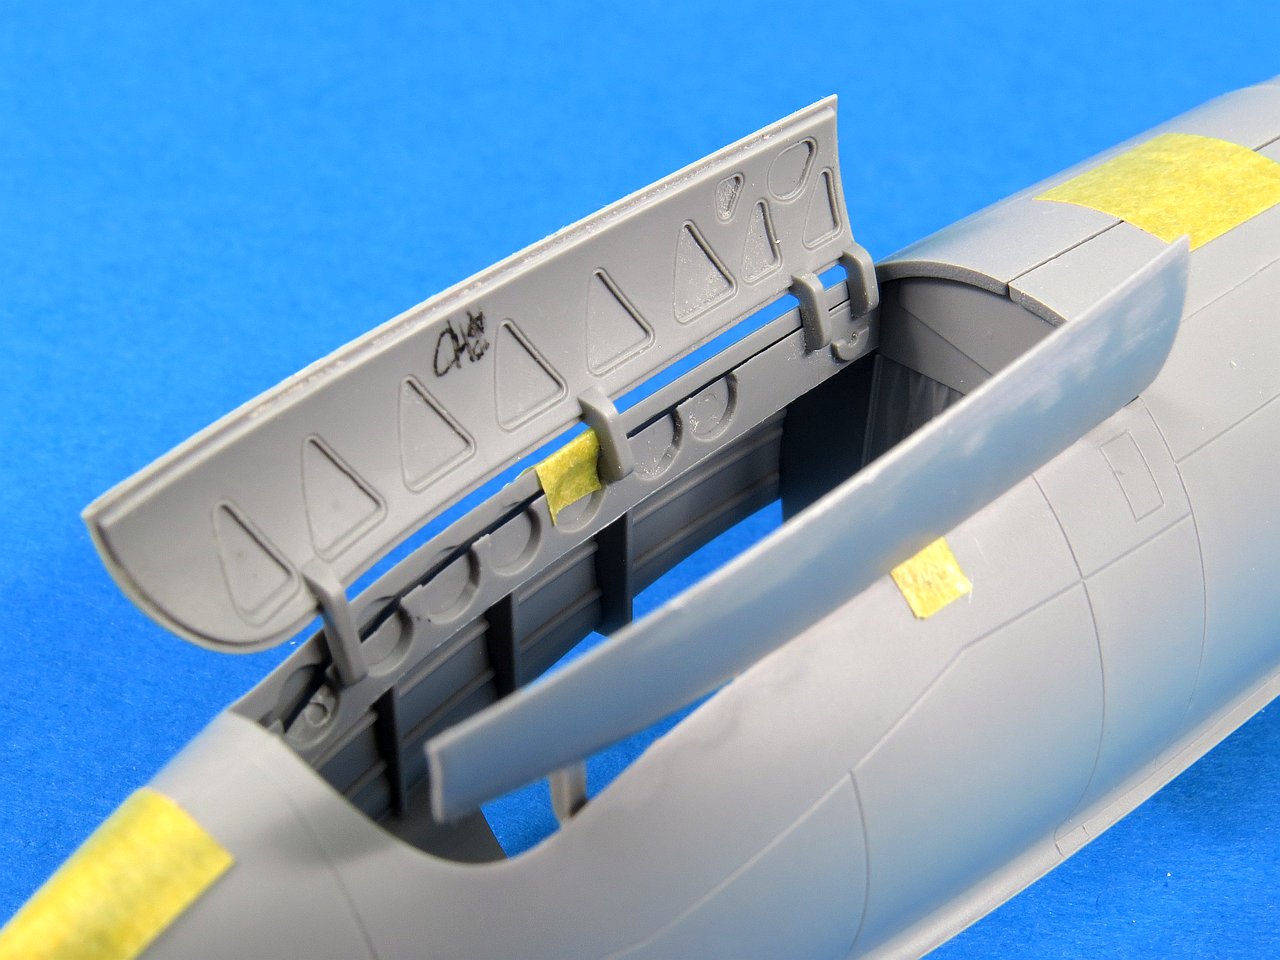
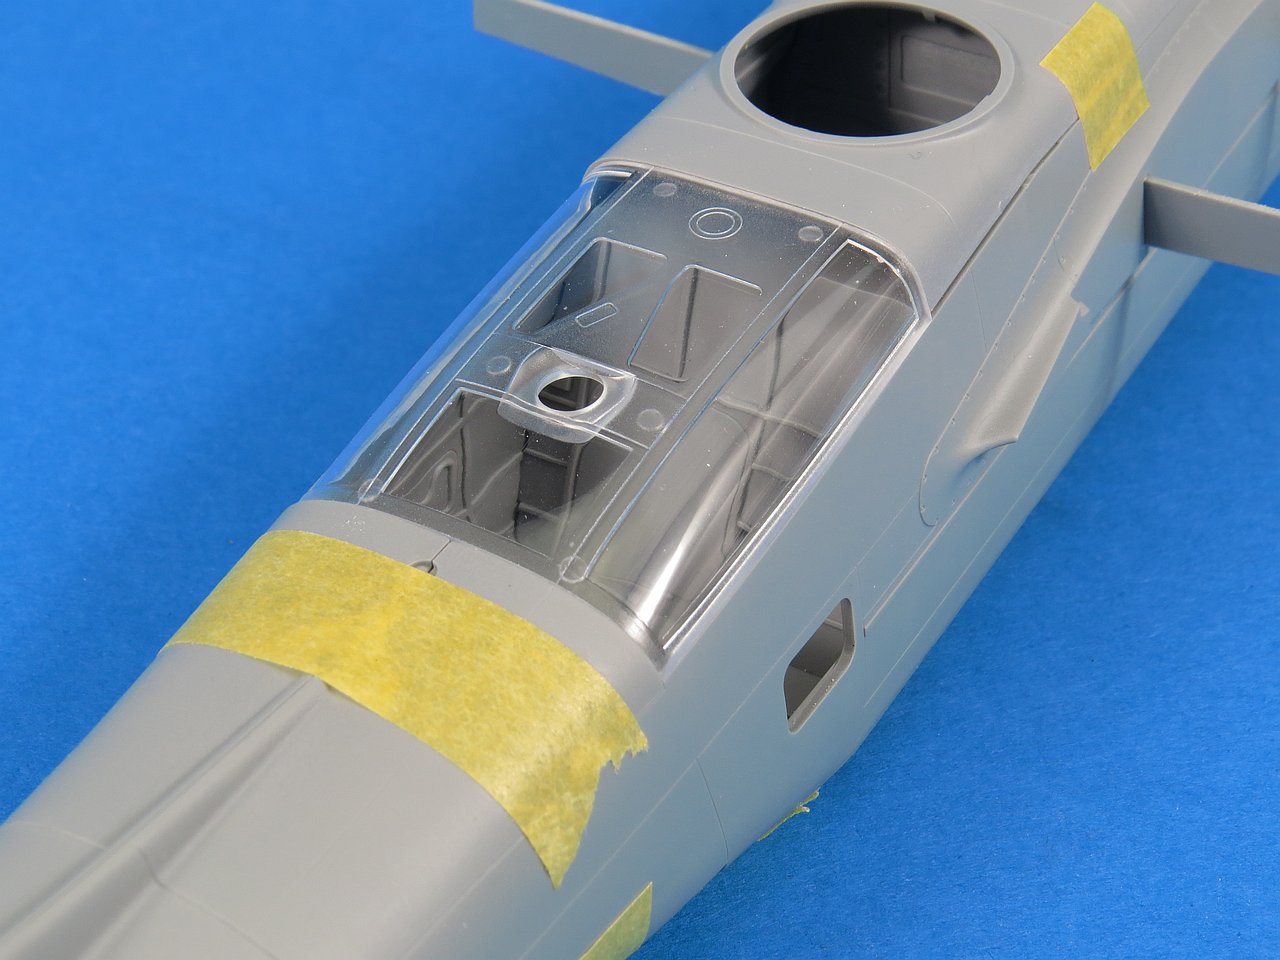
To complete the major fuselage assembly the clear parts can next be attached to close up the cockpit and gunners compartment.

The fit of the clear parts is excellent. All three schemes for this Korean war era Invader require the later "clam-shell" style canopy. The clam-shell provided much greater pilot visibility and opened outwards on both sides as they were hinged at the bottom (much like a clam). ICM does not provide an option to display the clam-shell canopy in the open position so I will likely see if I can manage to cut the parts with a razor saw and not break anything too badly.
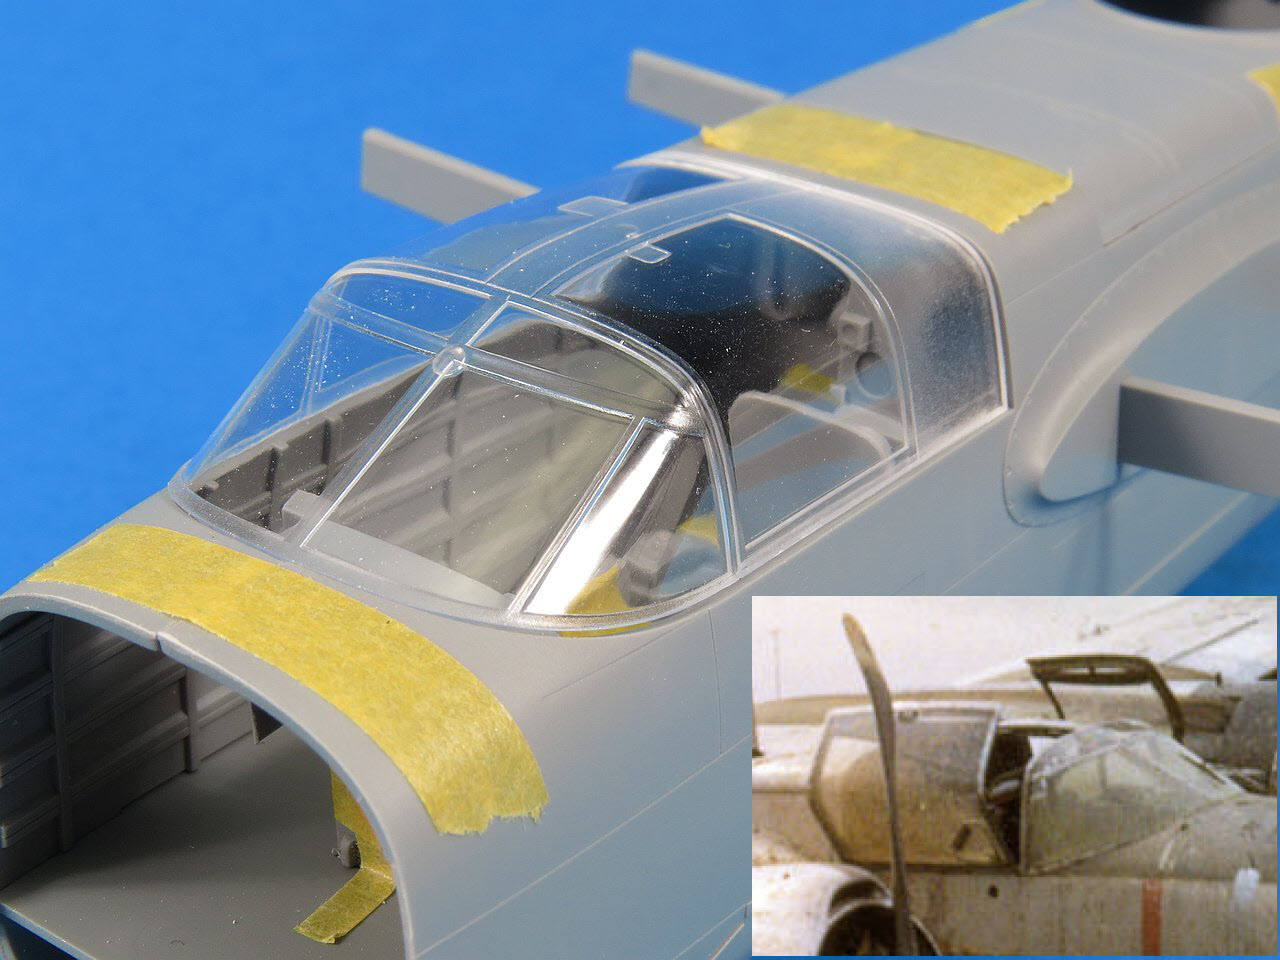
Likewise the clear cover for the gunners compartment is a good fit. This canopy also incorporated an escape hatch for the gunner on the top, but I'm not really keen to have a go at cutting this one as well as you very rarely (if ever) see it open on the ground (or in flight except when he had to bail out).
ICM provides both canopy options (early flat top and late clam-shell) on the clear sprue. The flat top even comes with the option to display the hatch open. As you can see the parts are well molded and free from blemishes or distortions.

A useful comparison of the two gun nose variants for the B-26B. The second boxing of this ICM kit will be for the early WW2 Invader and come with new nose/gun parts and use the flat top canopy.
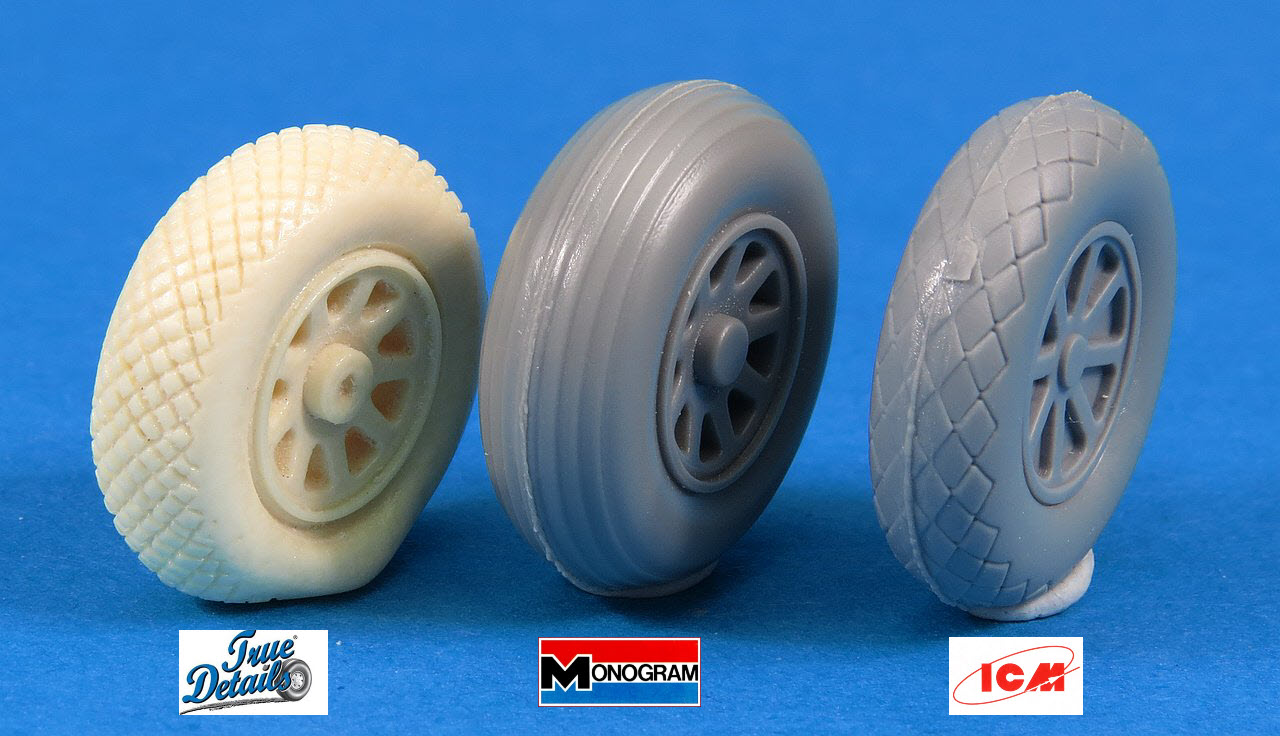
Moving onto the undercarriage, ICM provides parts for diamond tread main and nose wheels which were often fitted to the Invaders operating in Korea. The nose and main struts are simple affairs and the ICM plastic mirrors this.

This photo is one of the better ones I found that showed the relative size and shape of the Invader wheels and tires.

In addition to comparing the ICM kit wheels to the real thing I thought it may be interesting to see them side by side with a couple of other options. The first thing that popped out to me from the side-on comparison was just how much bigger the ICM wheels are compared to the Monogram and True Detail sets. Also the center wheel hub detail is quite different. The front view also highlights how much thinner the ICM wheels are. To my eye the True Details (or Monogram) wheels capture the chunkiness of the real Invader wheels far better than the ICM set and if I can avoid having to deal with cleaning up that diamond tread pattern all the better.


The main wheel gear strut is pretty basic on the Invader and about the only extra I will be inclined to add will be some brake lines. Looking at the tread on the tire I think ICM have done a credible job of reproducing the depth of the diamond pattern, it's just a pity about the seam down the middle.


Here is a similar comparison of the single nose wheel. Like the main wheels the ICM part is both larger (in diameter) and thinner in width than either the real thing or it counterparts.

A photo of several parked Invaders in Korea clearly illustrates the shape of the distinctive hollow hub of the nose wheel.

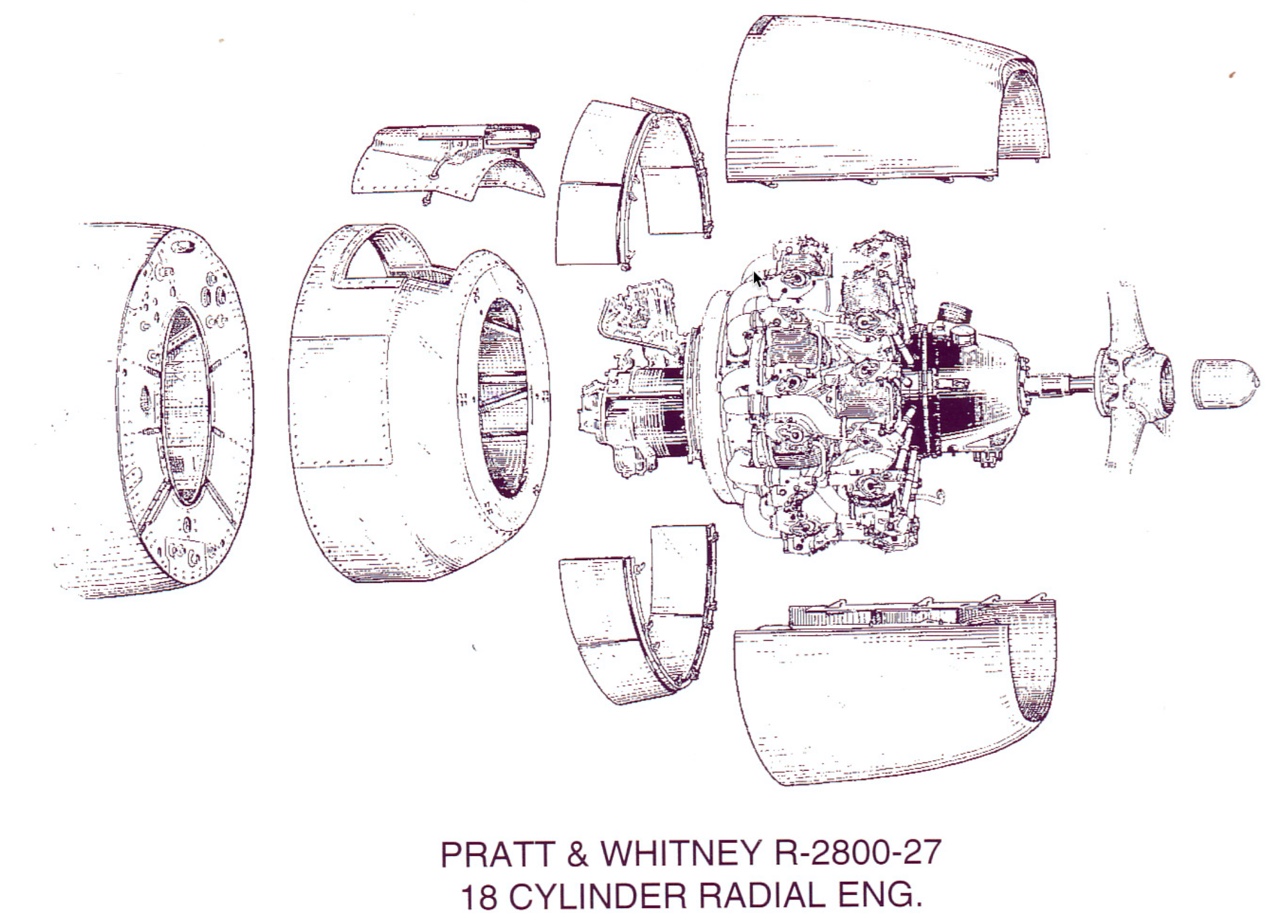
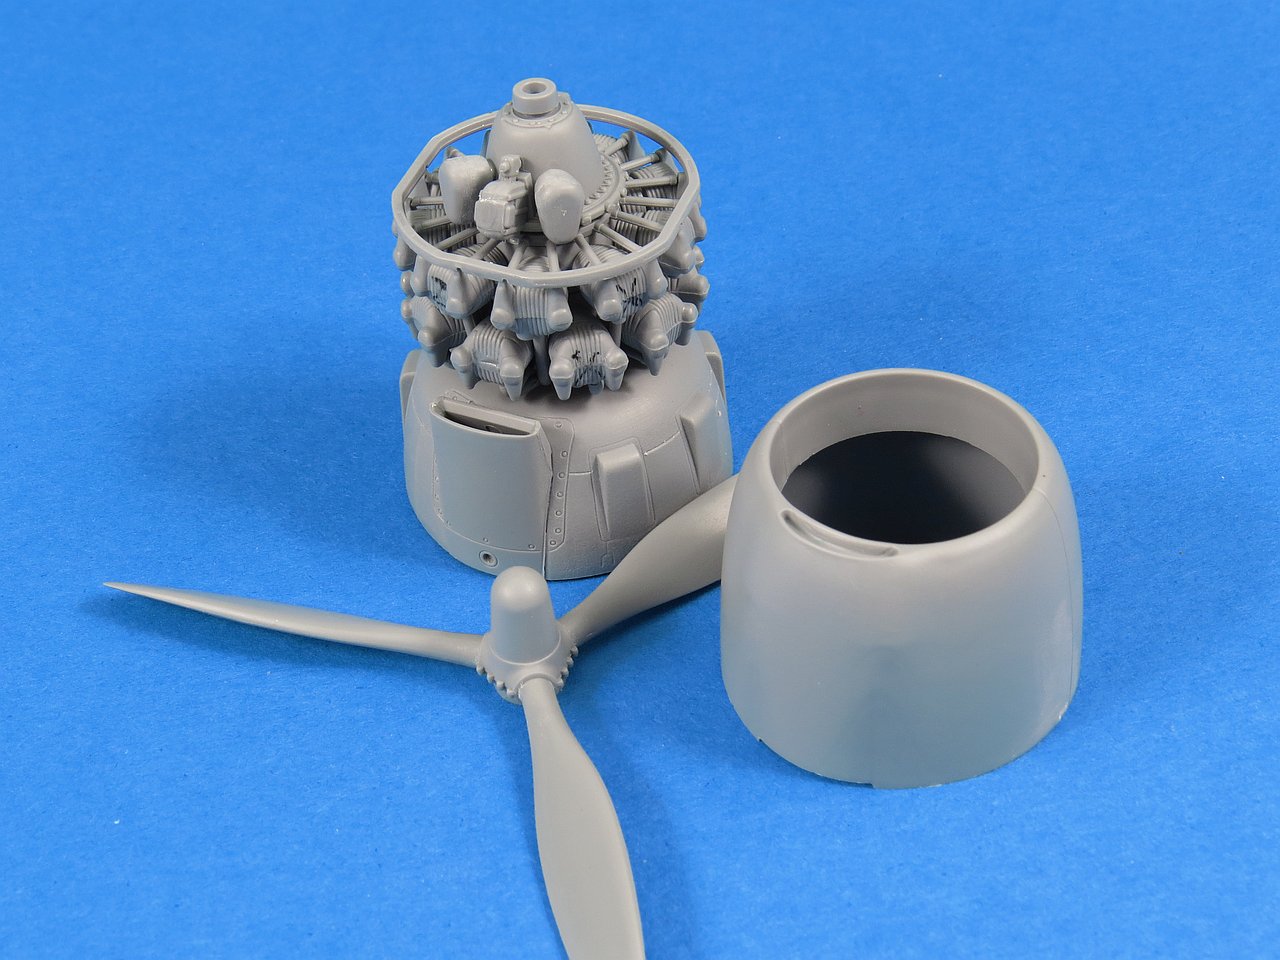
The A/B-26 was powered by two Pratt & Whitney R-2800-27 18-cylinder air cooled radial engines. These drove Hamilton Standard three-bladed, 12-foot-7-inch-diameter propellers. The R-2800 was the first modern American 18-cylinder engine and could easily be considered the workhorse of the USAF in WW2 (and beyond). ICM provides us with a full depth engine with both banks of cylinders.

The cylinder push rods are provided in a single ring with three sprue attachment points. Rather than use a cutter or knife I found a small chisel was the best option for cleanly removing the sprue runners. The cylinder halves fit together nicely with the push rods, crankcase and exhausts clicking into correct alignment using preset keys found on each part.


ICM have done an exceptional job of giving us a very detailed R-2800 in plastic including the complex exhaust arrangement, detailed crankcase with magnetos and even the ignition wiring ring. In fact about the only thing you might want to add to finish this off is some ignition wires. This engine really does cry out to be displayed with the cowlings off


To aid with the positioning and alignment when fitting the myriad of exhaust stubs to the rear of the engine, ICM have cleverly provided a "template" part (E34) which you temporarily attach (not glue) to the rear of the engine where it provides a support for the exhausts while your glue dries. This is excellent attention to detail and I think its first time I have seen this type of thing.

This high resolution photo (click it to see the full hi-res version) of a new R-2800 being fitted to an Invader is the sort of perfect reference we modellers dream of. With this as inspiration I intend to display at least one of my Invaders engines with the cowlings off.

To make sure I put the right exhaust stub the the right place I have marked the "template" part with the associated number. Remember to NOT glue the template to the rear of the engine, it's only there to help you get the exhausts lined up properly.

As you would expect the ends of the exhaust stubs have not been opened up by ICM. That's a tall order for plastic injected parts and I'm sure that eventually someone (maybe Quickboost) will come out with a set of resin replacements but in the mean time if you want to have open exhausts you can use some elbow grease and drill them out. Here I have used a 0.6mm drill bit to make a start. If you do both engines that's a total of 72 stubs that need to dealt with [whew]. The real exhausts are in fact elliptical and I need to experiment a bit to figure out a way to reproduce that as well.


A useful drawing that shows all the components of the nacelle, mount and cowlings that comprise the Invader engines. If you decide to leave the main cowlings off to show the engine, be sure to cut them in half (along the panel line) so you have a top and bottom piece.
A front and rear mounting ring is provided by ICM to ensure the cowling sits flush around the engine when installed.
This photo is a good study of the upper engine cowling. The cowling flaps are open on this parked aircraft and notice the exhaust staining on the nacelle body and wing. Also take note of the open clam-shell canopy

As part of my reviews I like to highlight places where manufacturers do good (as well as bad) things. One example of good engineering is the way ICM have designed the sprue attachment points for the propeller. Attaching in this way makes the modellers job super easy. Something we all appreciate.

A quick side by side comparison of the kit propeller reveals a couple of small shape issues. I feel the blade is a little too thick towards the base and the tip is not rounded enough. Each of these niggles can be easily addresses with a sanding stick.

With the exception of the 5in HVAR rockets, ICM provide a full array of weapons commonly carried by the B-26 Invader on the wing stations. For a full war-load you will need to source more 500lb or 1000lb bombs elsewhere because ICM is quite frugal with their weapons in the kit.

A closer look at the wing mounted .50cal guns shows that they also had covering tubes over them. Its also interesting that the tube length seemed to vary in the field with some being staggered (like the guns themselves) and others being symmetric. Notice how the barrels have no tapered shrouds like ICM have provided and that both photos show protective caps over the end of the barrel.

When compared to the photos above the ICM molded tapered shrouds on each barrel look quite odd. These would look more at home on a Hawker Typhoon or Tempest !! I plan to cut these off and replace with simple straight tubing.

Nearing the end now and our last task is to install the bomb bay doors in either open or closed position. Its appreciated that ICM provide a closed door option as this will always result in a better outcome than trying to glue two doors together.


So that's a wrap on the main assembly review. At this point it would be time to get the airbrush loaded up and start painting.


COLORS & MARKINGS - ICM 1:48 B-26B-50 Invader (48281)
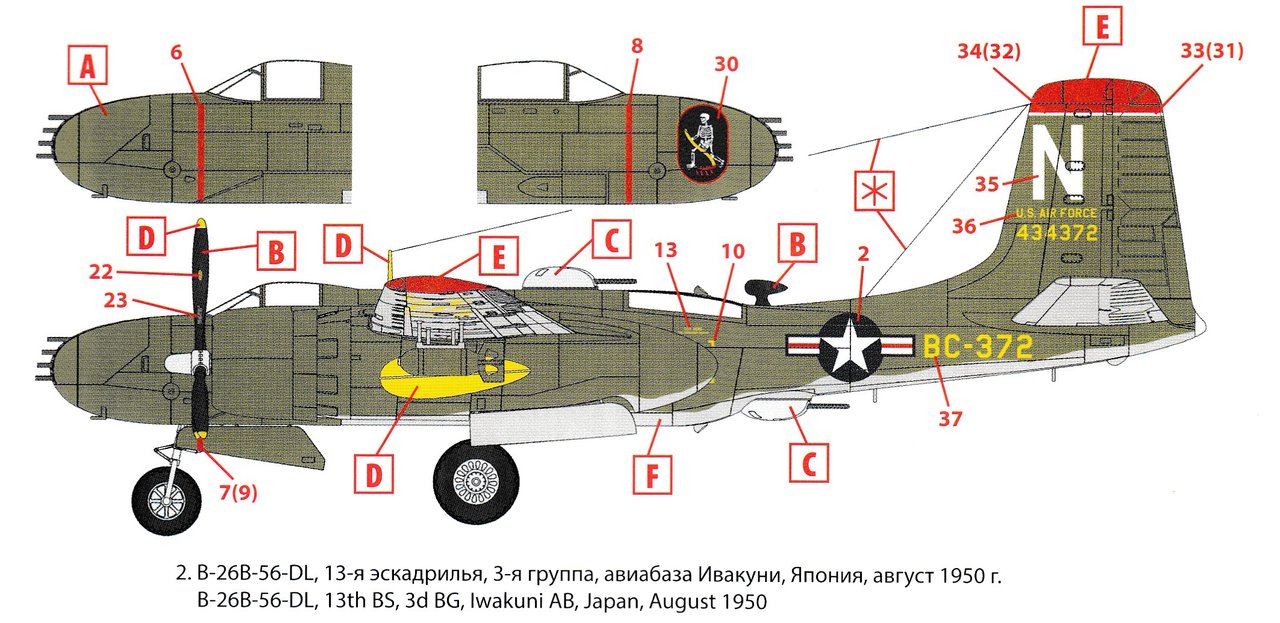
ICM provide three marking options in the box, two olive drab and one natural metal. All three aircraft are depicted as they were at the start of the Korean conflict when based in Japan.


In addition to the marking options provided in the box, ICM have released two additional sets of decals for purchase. D4801 is designed for the A-26B/C and features WW2 markings and D4802 is designed for the A-26B/C with additional Korean War marking options. Several of the schemes on sheet D4802 are A-26C glass nose bombers so it seems likely that ICM will be giving us the C variant at some point.


CONCLUSION - ICM 1:48 B-26B-50 Invader (48281)
So our new 1:48 Invader is finally here. Hooray!! Like many others I have my fingers and toes crossed that ICM have someone tucked away working on a new B-26 Marauder as well. Having now poked and prodded this new kit pretty closely, I've certainly found it disappointing in some areas and delighting in others.
On balance overall I feel this B-26 tooling is a worthy successor to the venerable Monogram kit. I fully expect the aftermarket companies like Eduard and Quickboost to turn out more than a few goodies to enhance your build but I'm confident that most modellers will enjoy building this kit and be able to make a great model out of it just as-is.
ICM has delivered another high quality kit to add to their growing catalog and if you are still on the fence I'm happy to push you over so you can go buy one.
The kit seems to be retailing for around USD $85 which is the same price being asked for it's recent stablemates like the He 111. Many thanks to ICM and The Modelling News for supplying
the review kit.
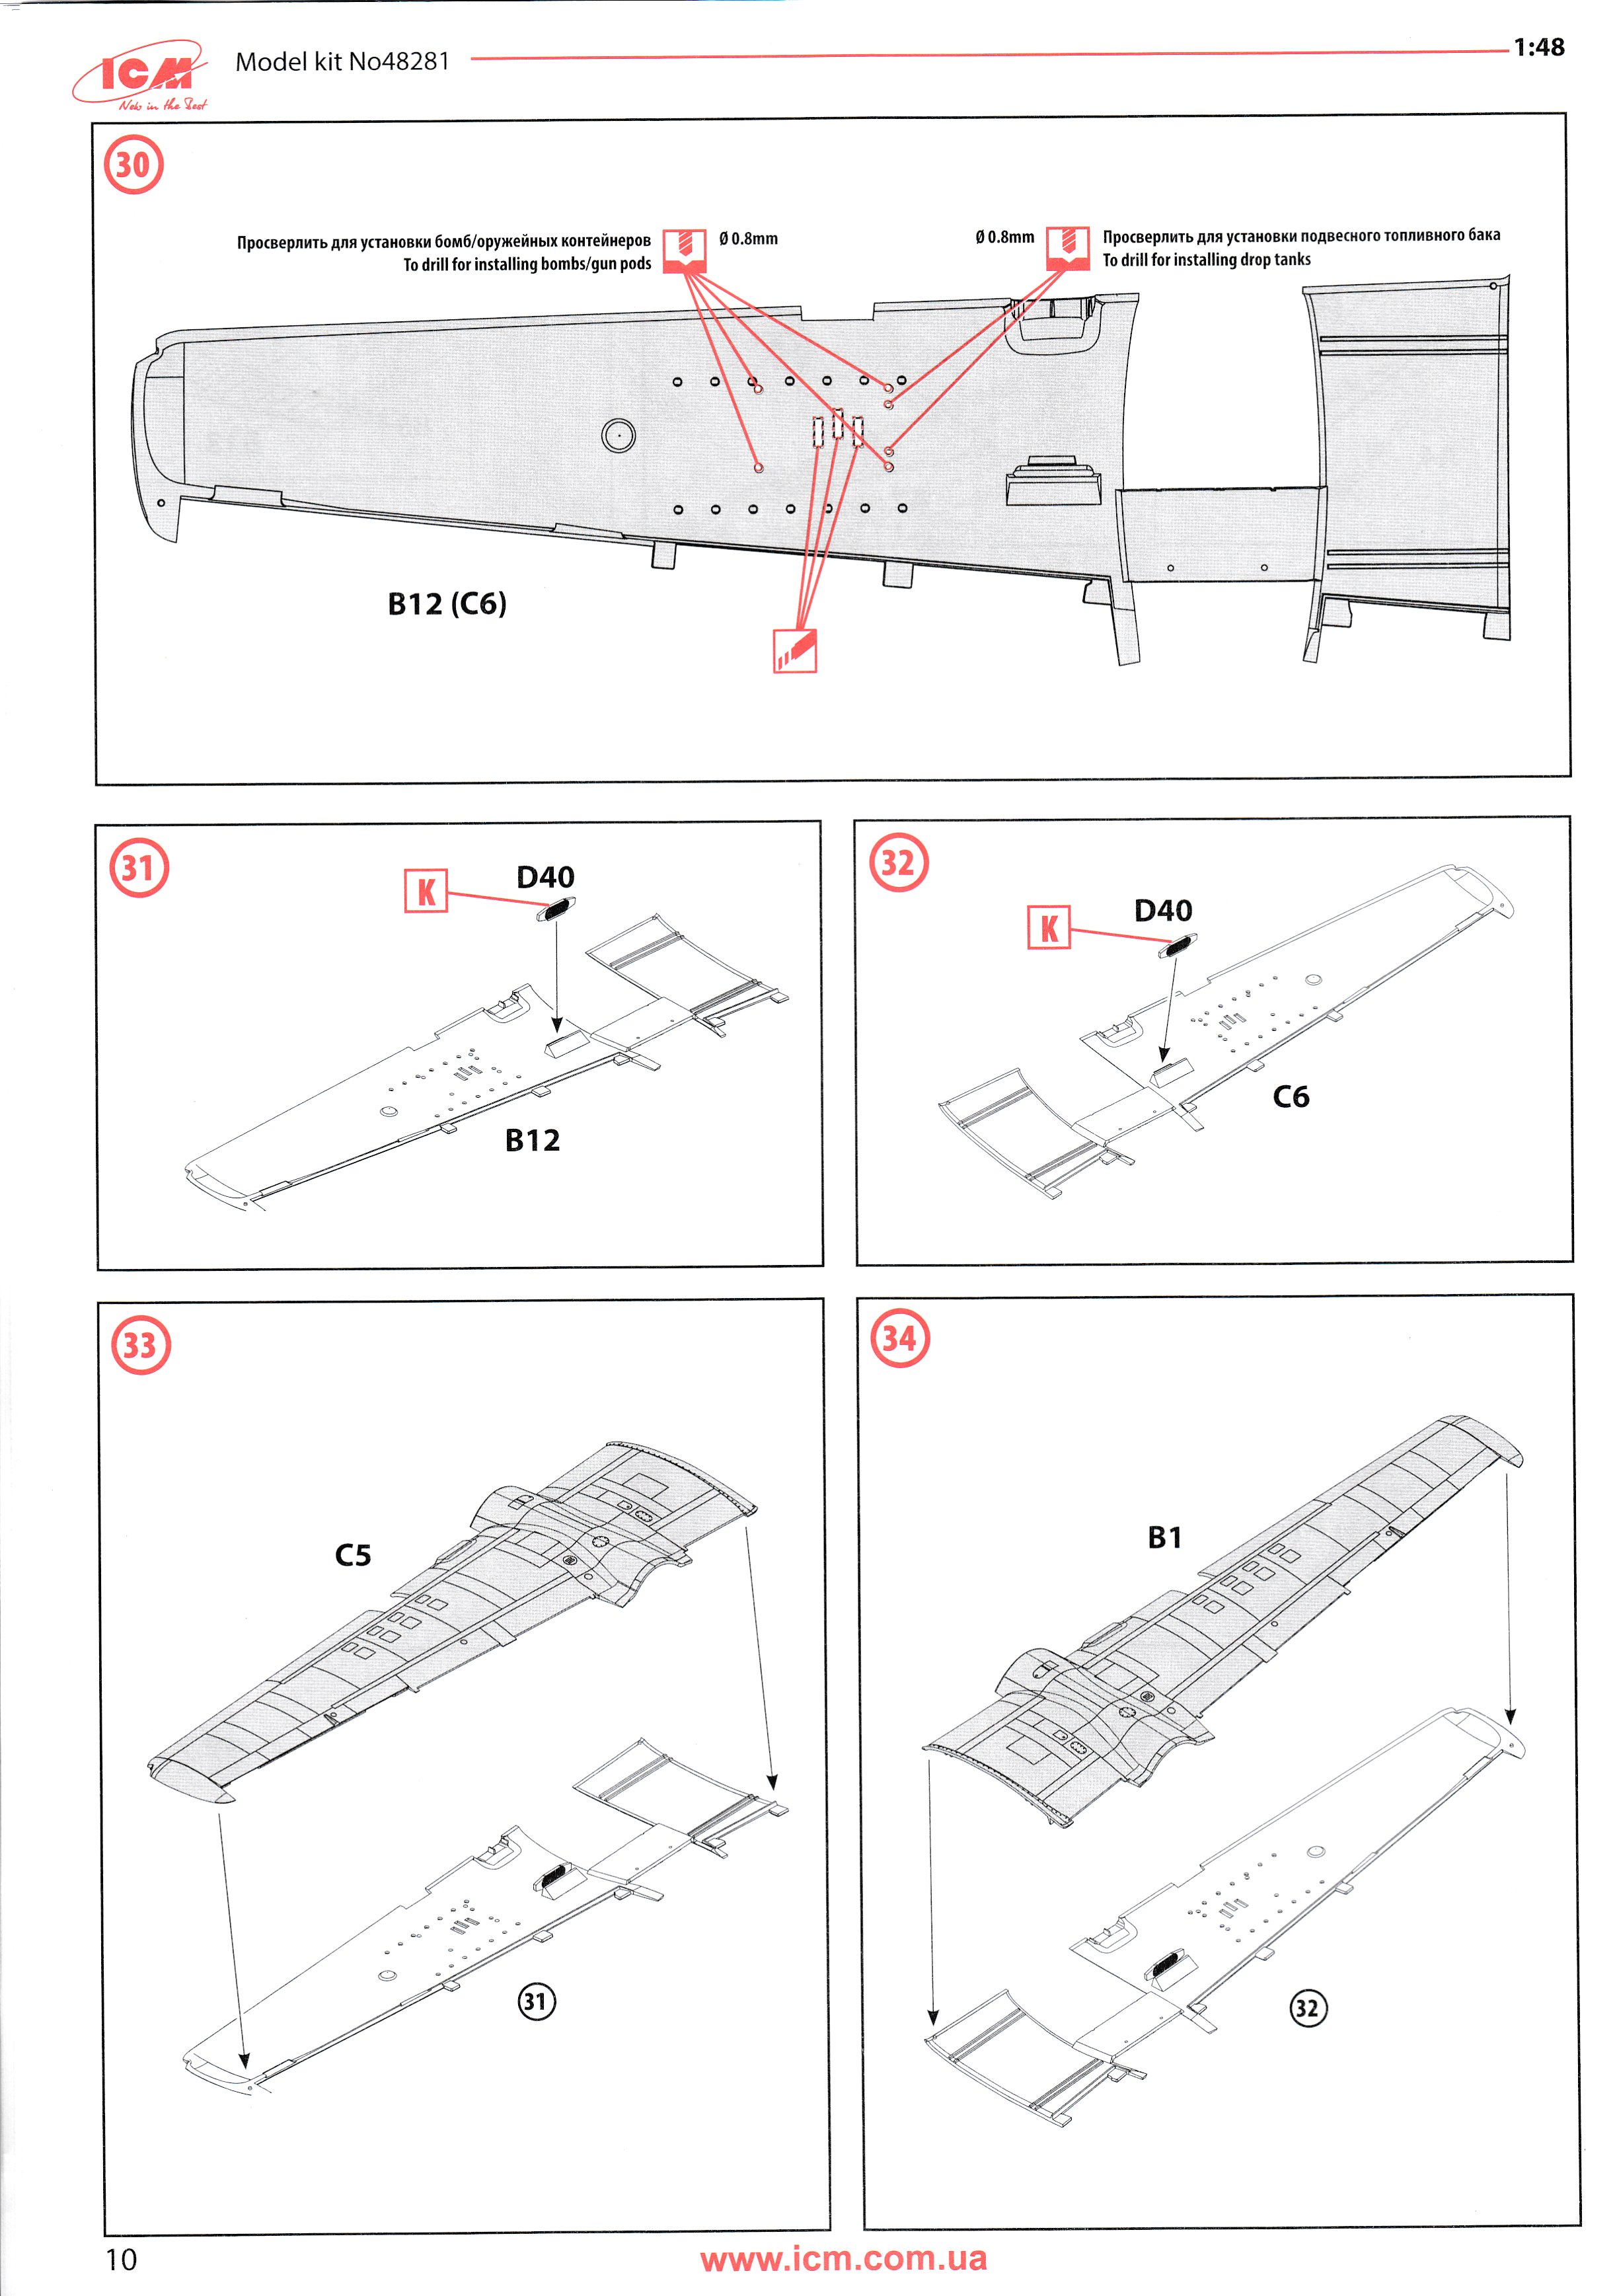
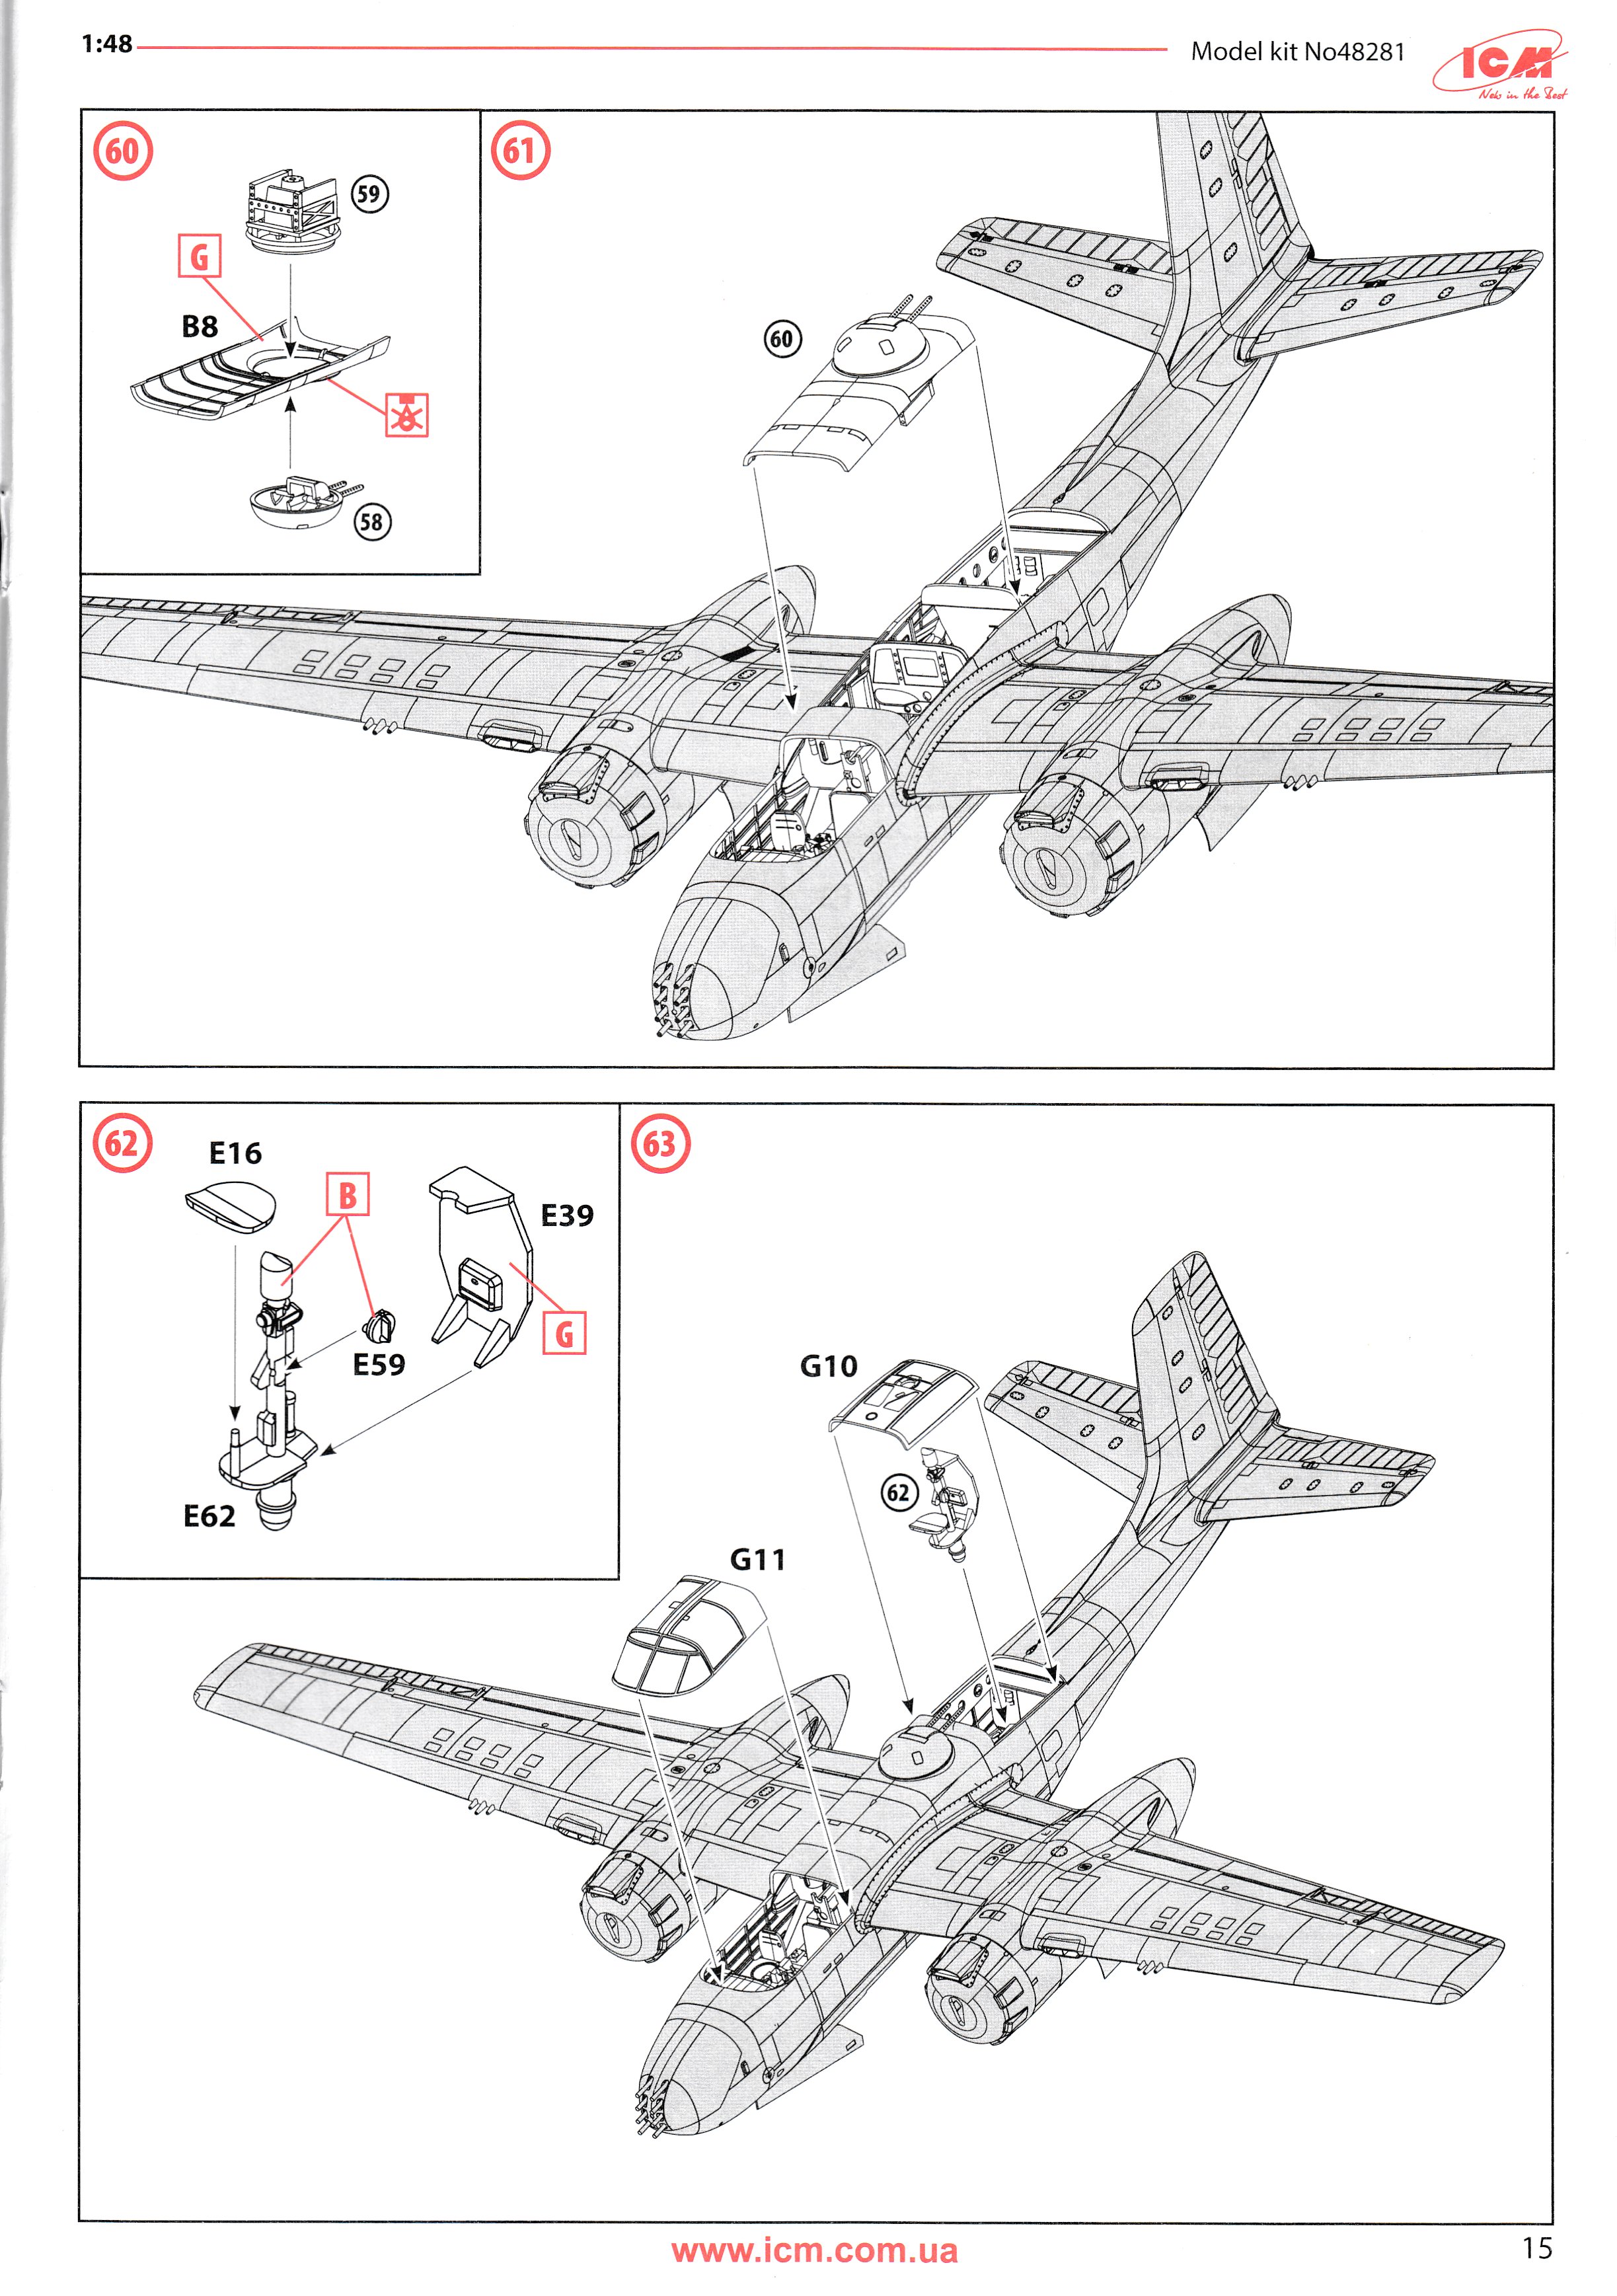
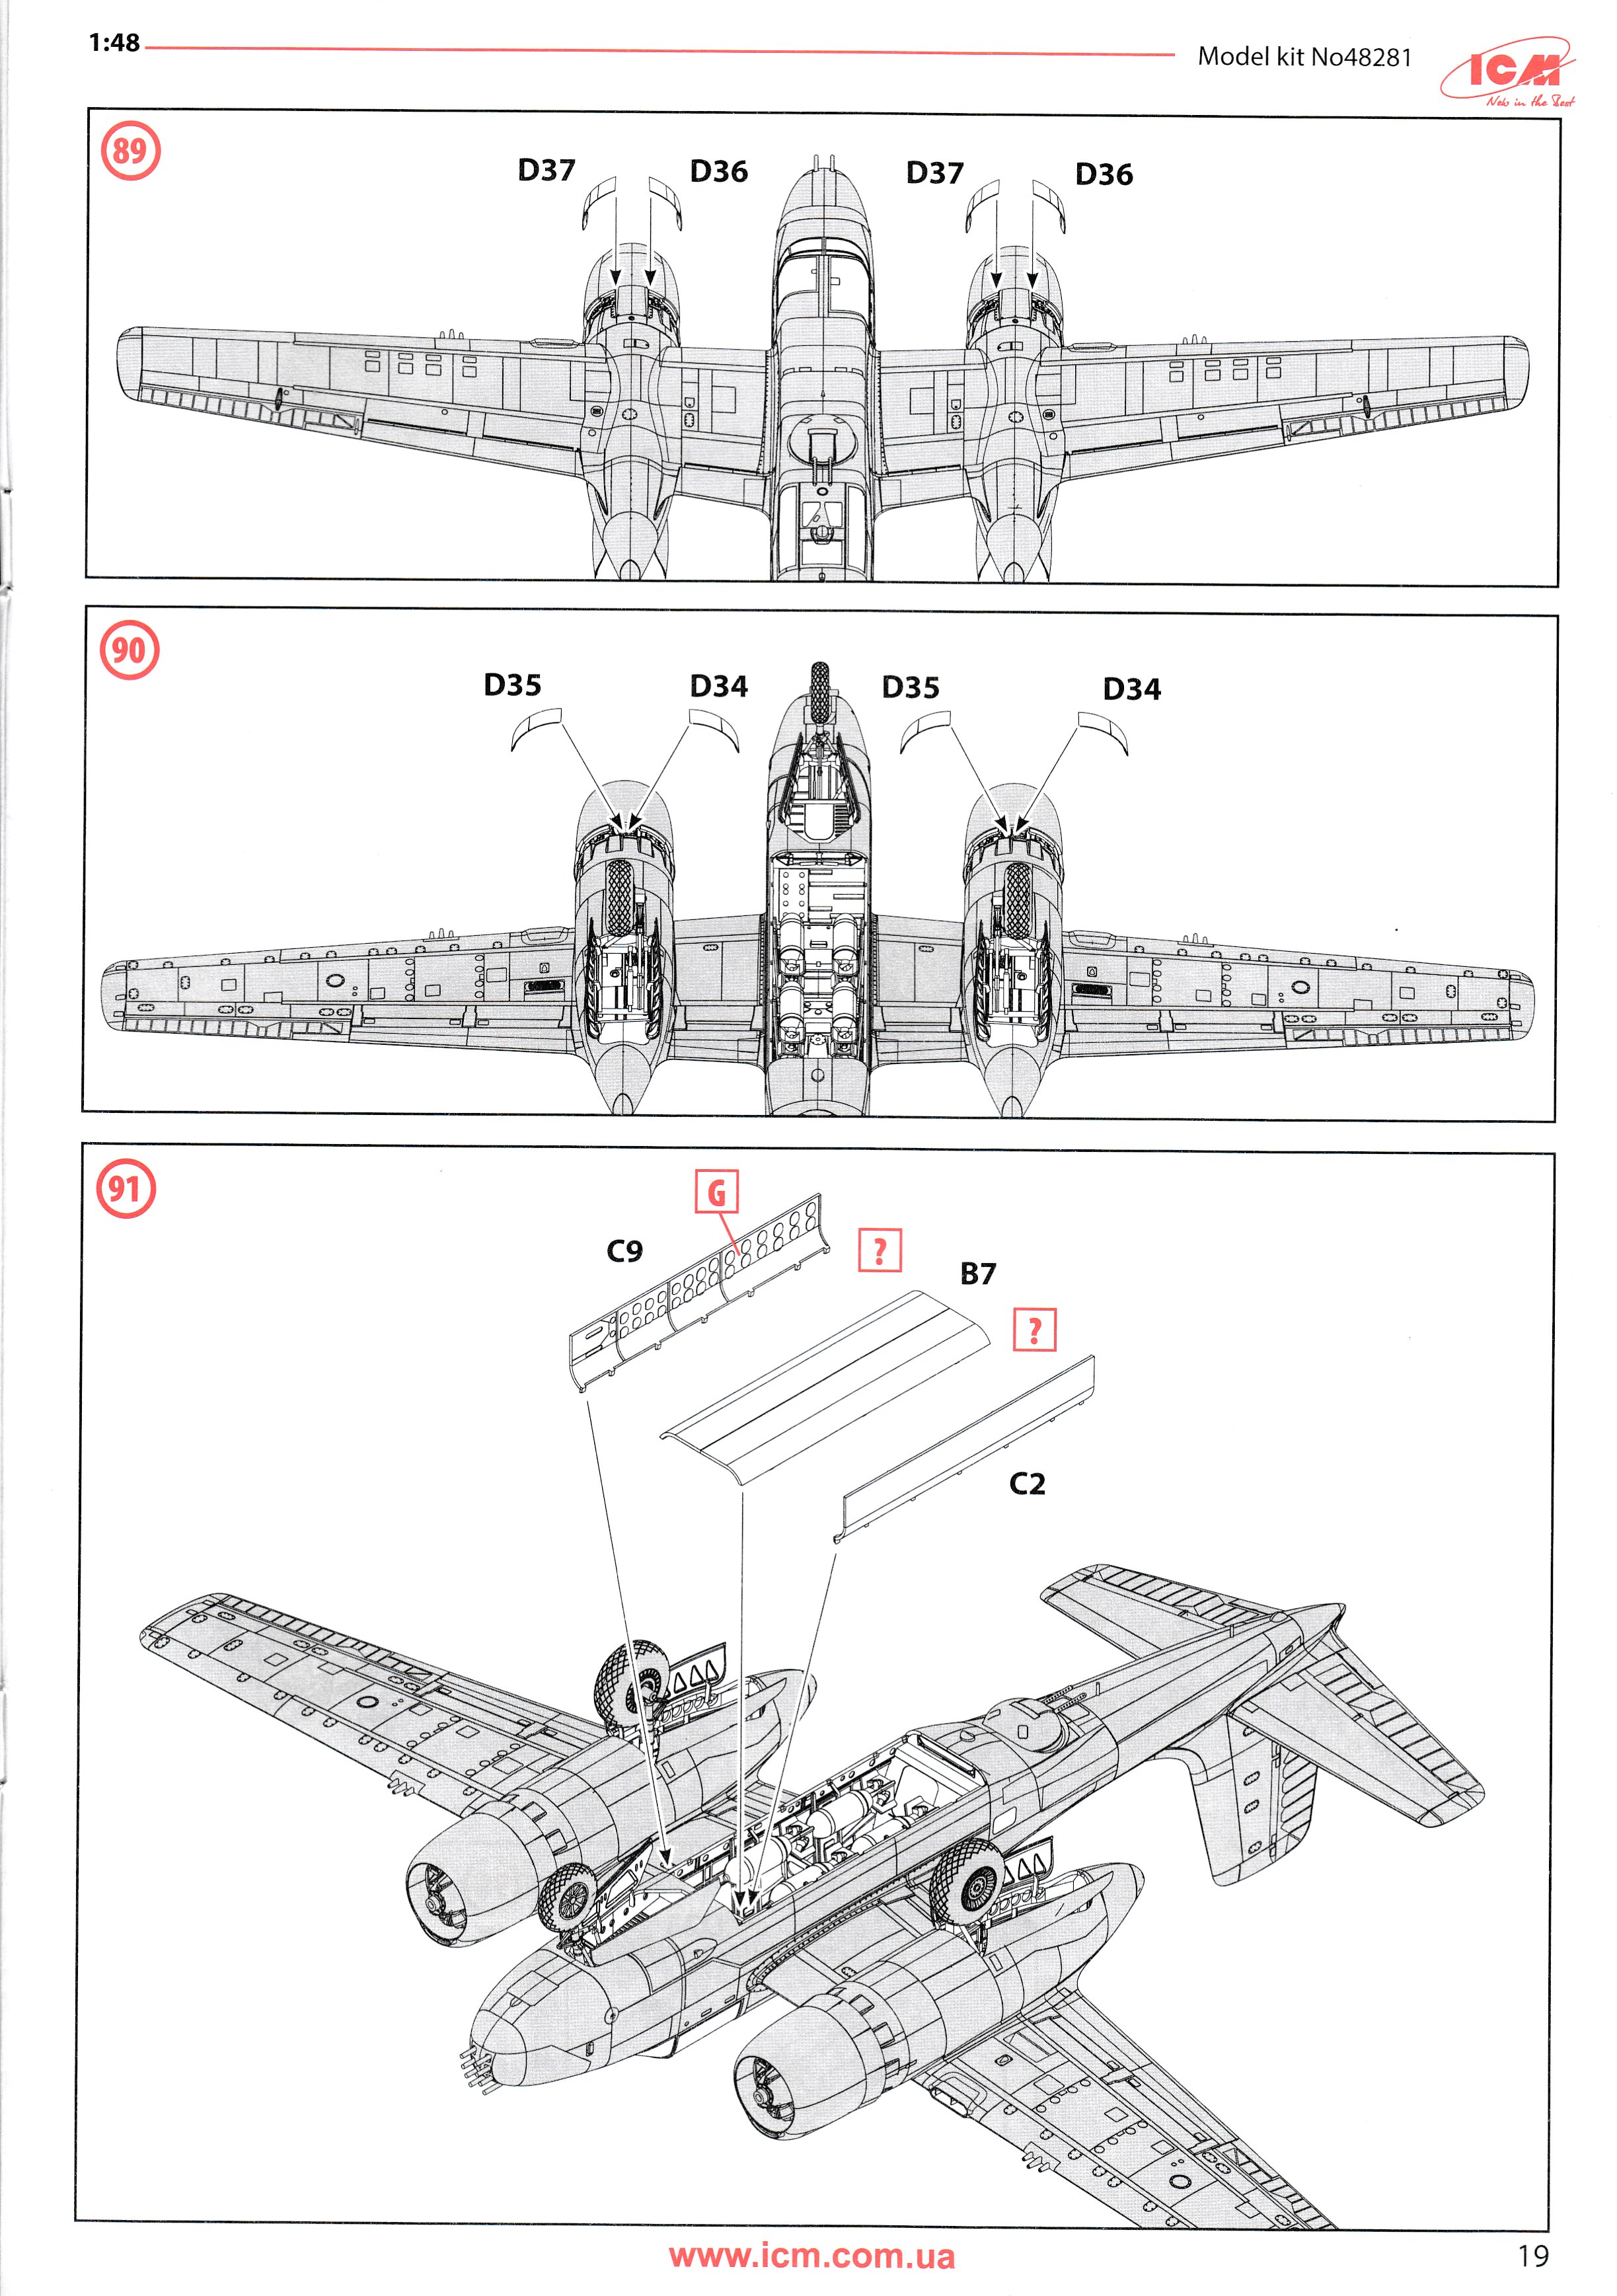
ASSEMBLY INSTRUCTIONS - ICM 1:48 B-26B-50 Invader (48281)